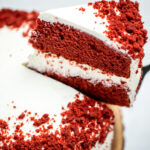
Gluten Free Red Velvet Cake
Gluten Free Red Velvet Cake is rich and moist, made with cocoa powder, vanilla, and tangy buttermilk layered with a sweet whipped cream cheese frosting, perfect for a special occasion!
Servings: 12 servings
Calories: 562kcal
Equipment
- 1 Stand mixer
- 2 9-inch cake pans
Ingredients
- 1/2 cup butter unsalted, softened
- 1 1/2 cups white sugar
- 3 large eggs at room temperature, separated
- 2 teaspoons vanilla extract
- 2 1/2 cups gluten free flour 1:1
- 3 tablespoons unsweetened cocoa powder
- 2 teaspoons baking powder double acting
- 1 teaspoon baking soda
- 1/2 teaspoon salt
- 1 cup buttermilk
- 1 cup sour cream
- red food coloring gel or liquid, until desired color is reached
Whipped Cream Cream Cheese Frosting
- 8 ounces cream cheese softened
- 1 cup powdered sugar
- 1 teaspoon vanilla extract
- 2 cups heavy whipping cream cold
Instructions
- Preheat the oven to 350°F. Add butter and sugar to a stand mixer and cream together on medium-low speed.
- While mixing, add the vanilla and the egg yolks one at a time, leaving a few seconds for one to mix in before adding the next one. Mix until well combined. Stop the mixer and scrape the sides and bottom of the bowl to make sure everything is mixed in.
- In a medium bowl, whisk together all of the dry ingredients. Slowly add the dry ingredients to the butter mixture on medium speed.
- Once all of the dry ingredients are mixed in, turn the mixer to medium-low speed add the sour cream and buttermilk. Pour the buttermilk in slowly so it does not splash.
- While mixing, add the food coloring until the desired color is achieved. Stop the mixer and scrape the sides of the bowl to make sure everything is completely mixed in.
- In a separate clean bowl, whisk the egg whites until they are very foamy but not quite stiff peaks. Use a spatula to gently fold the egg whites into the cake batter until mixed in.
- Grease two 9-inch cake pans with butter, and pour the cake mixture into the prepared cake pans evenly. Bake for 30-35 minutes, or until the a toothpick comes out clean. Let the cakes cool completely before decorating.
How to Make Frosting
- Add cream cheese, powdered sugar, and vanilla to the mixing bowl of a stand mixer. Cream everything together on medium-low speed until completely combined. Be careful not to over-mix.
- Once the frosting forms stiff peaks, turn the mixer off. Store the frosting in the refrigerator until ready to use.
Notes
Click on the time in the instructions to start a timer!
Storage
- Refrigerate for 4-5 days. Dairy based frostings must be refrigerated for food safety.
- Freeze for 2-3 months, wrapped tightly or stored in an airtight container to prevent freezer burn. Defrost in the refrigerator before serving.
- Scrape the bottom of the mixing bowl with a rubber spatula to make sure everything is mixed together.
- Trace the bottom of the baking pans on parchment paper, cut the circles out, then line the pans bottoms with parchment paper to help prevent the cake from sticking.
- The baking time can vary if you live at a higher elevation.
- This recipe makes two layers. If you want more than that, you have to make a double batch, or use smaller cake tins.
- Place your cake on the rack in the center of oven for even cooking.
Nutrition
Calories: 562kcal | Carbohydrates: 58g | Protein: 8g | Fat: 35g | Saturated Fat: 21g | Polyunsaturated Fat: 2g | Monounsaturated Fat: 9g | Trans Fat: 0.3g | Cholesterol: 144mg | Sodium: 365mg | Potassium: 222mg | Fiber: 3g | Sugar: 39g | Vitamin A: 1293IU | Vitamin C: 0.4mg | Calcium: 144mg | Iron: 1mg