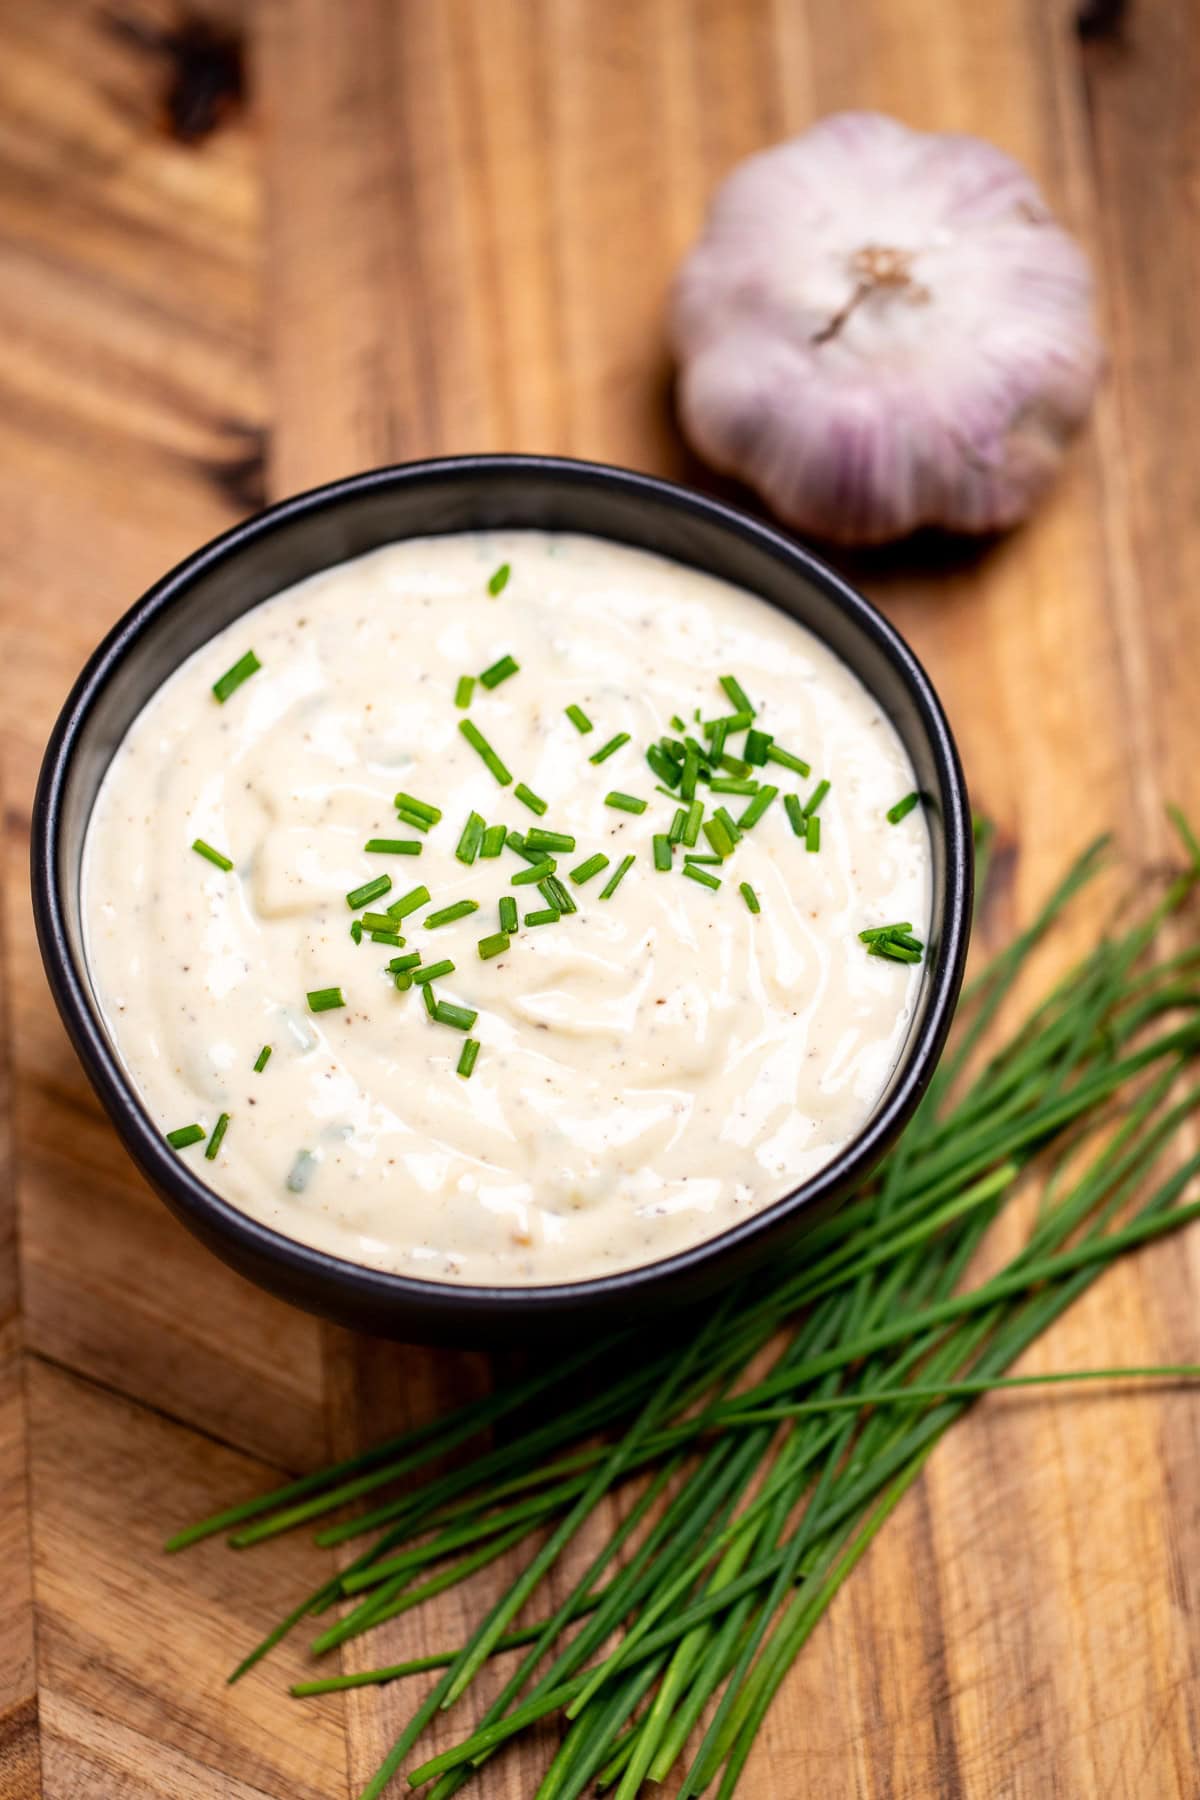
Roasted Garlic Aioli
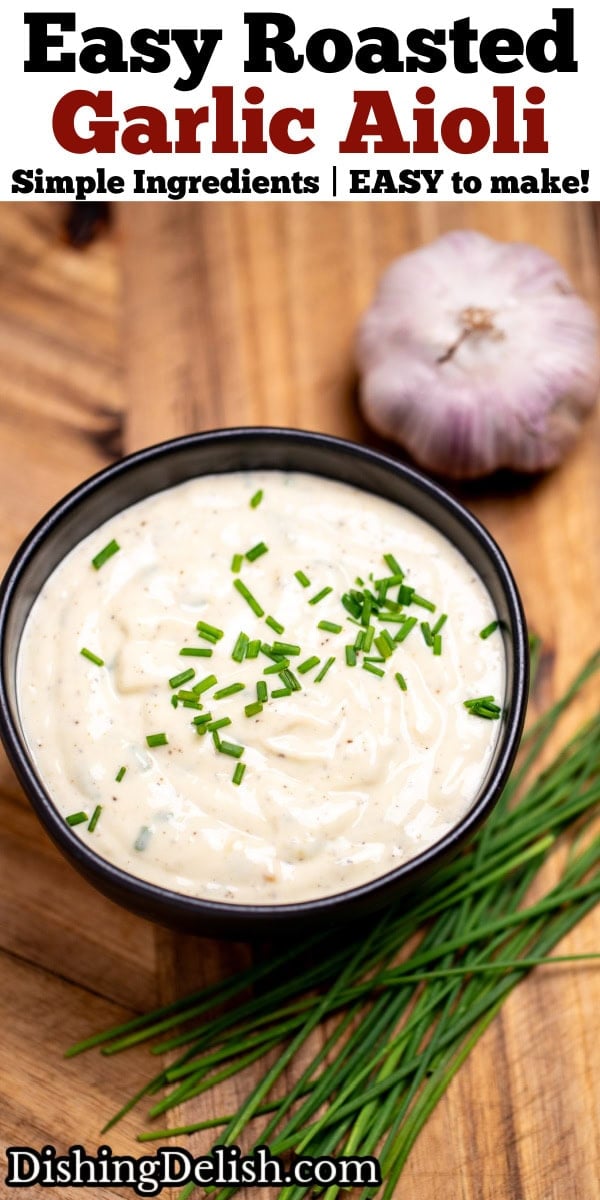
Roasted Garlic Aioli is the PERFECT dipping sauce, made with roasted garlic blended with olive oil, lemon juice, mayo, and spices, ready in under 45 minutes!
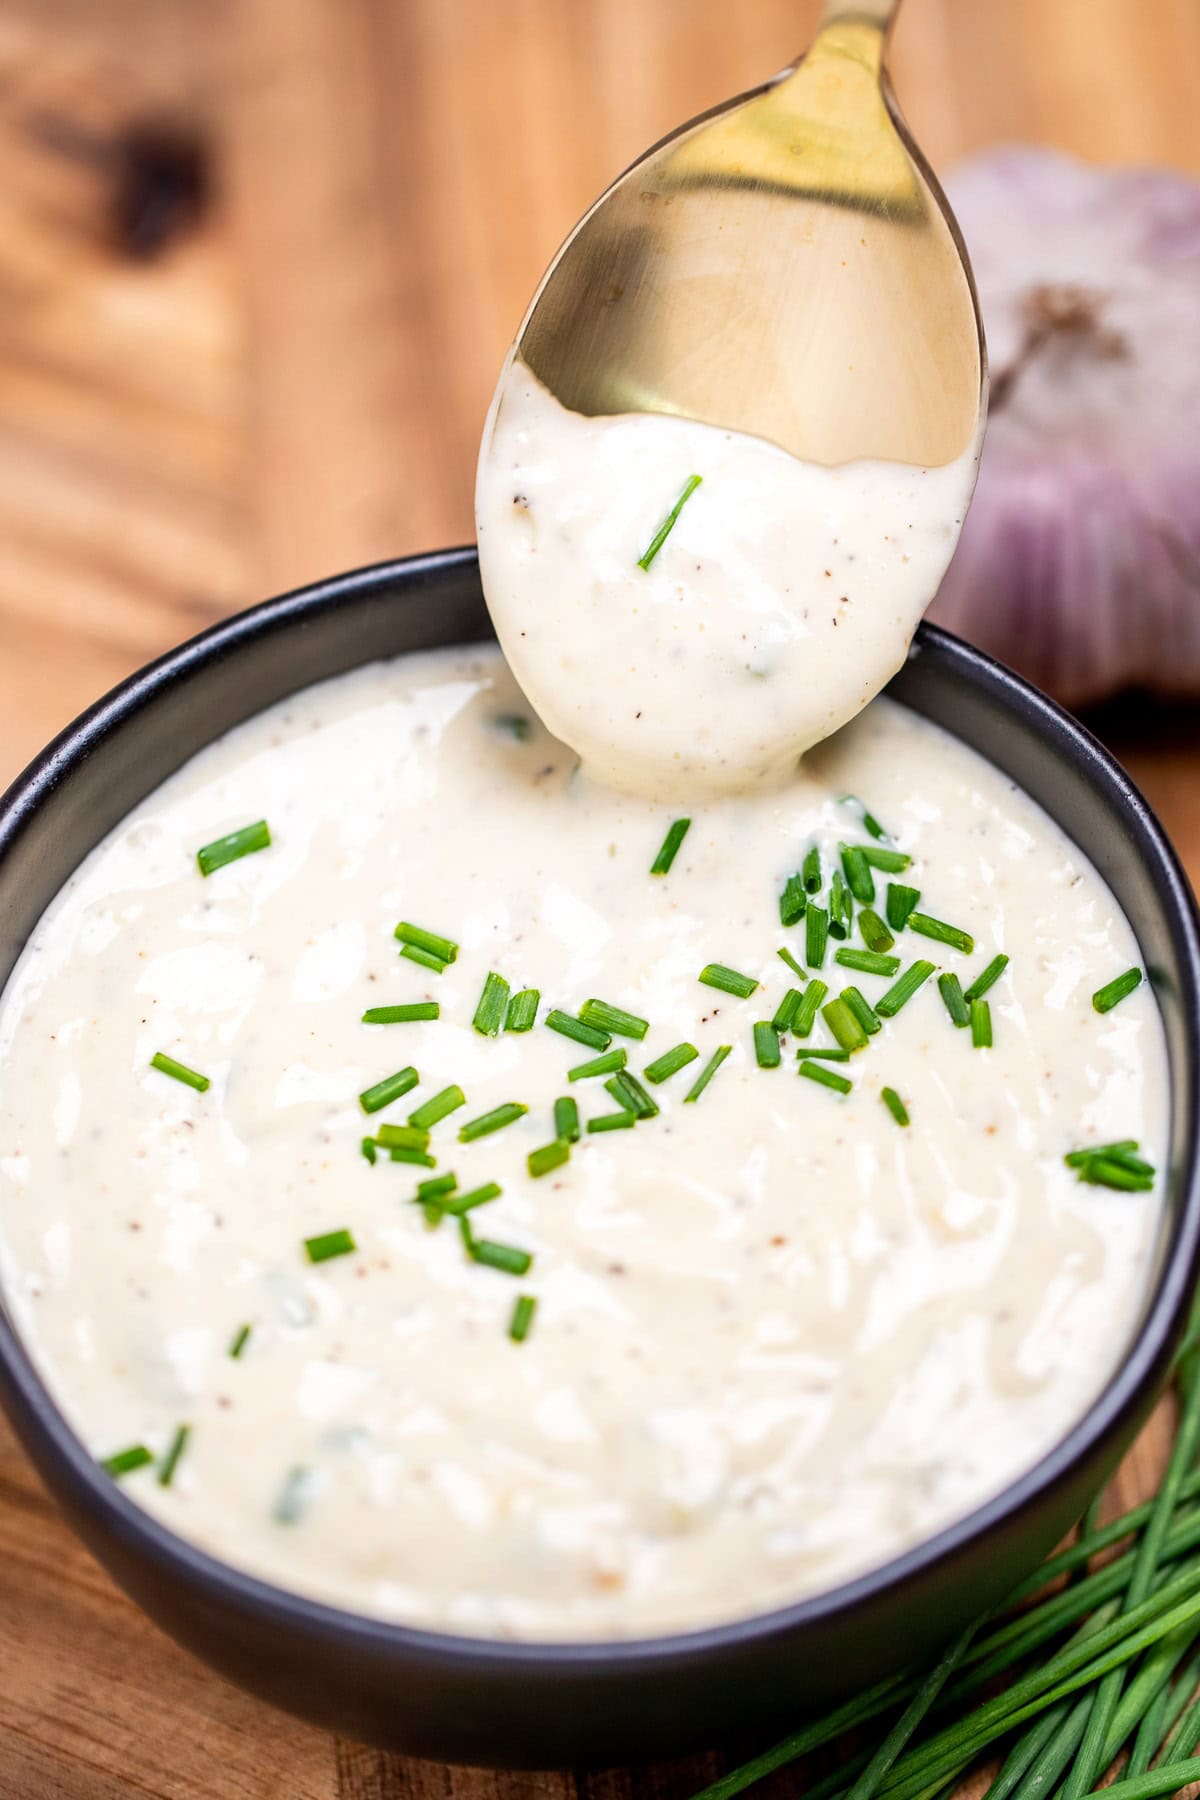
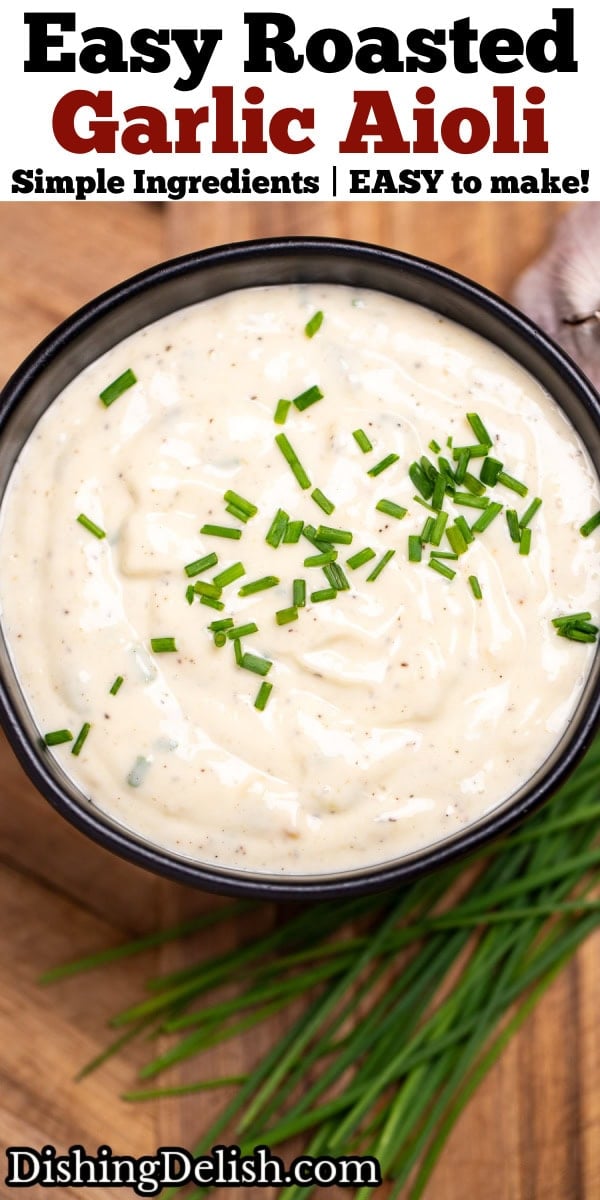
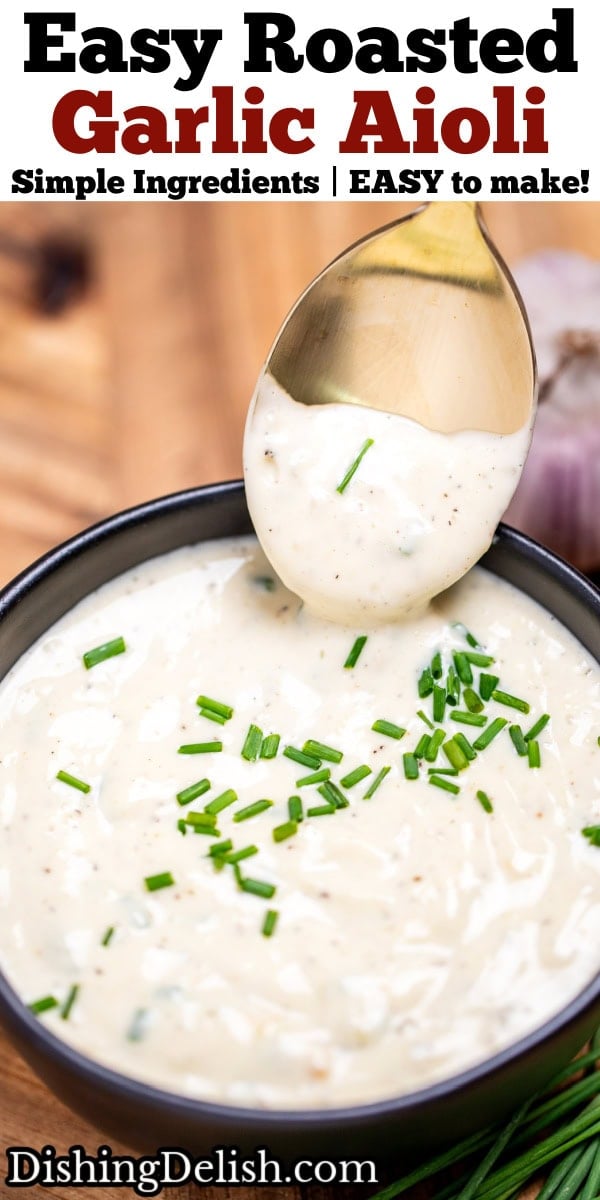
This roasted garlic aioli is savory, creamy, and tangy, perfect on burgers or sandwiches, or paired with sweet potato fries! Made with simple ingredients like mayo, olive oil, lemon juice, and a head of roasted garlic, it’s the ultimate upgrade to your regular weeknight dinner. Plus, this aioli recipe is ready in under 45 minutes, with most of the time just waiting for the garlic to roast!
If you loved this recipe, you’ll also love my Homemade Tzatziki Sauce. This garlic aioli recipe also pairs perfectly with my Air Fryer Potato Wedges or Parmesan Crusted Tilapia!
If you want to know more about roasting garlic, check out my Oven Roasted Garlic recipe.
Table of contents
Why You’ll Love This Recipe
Restaurant Style – This roasted garlic aioli immediately makes your food taste like it came out of a professional kitchen. The roasted garlic adds a really nice savory note that you don’t get with regular aioli, and the lemon juice gives it a really nice fresh flavor.
Comfort Food – This pairs really well with your favorite comfort foods! Try it with crispy fries, burgers, grilled fish, or chicken.
Ingredients You’ll Need
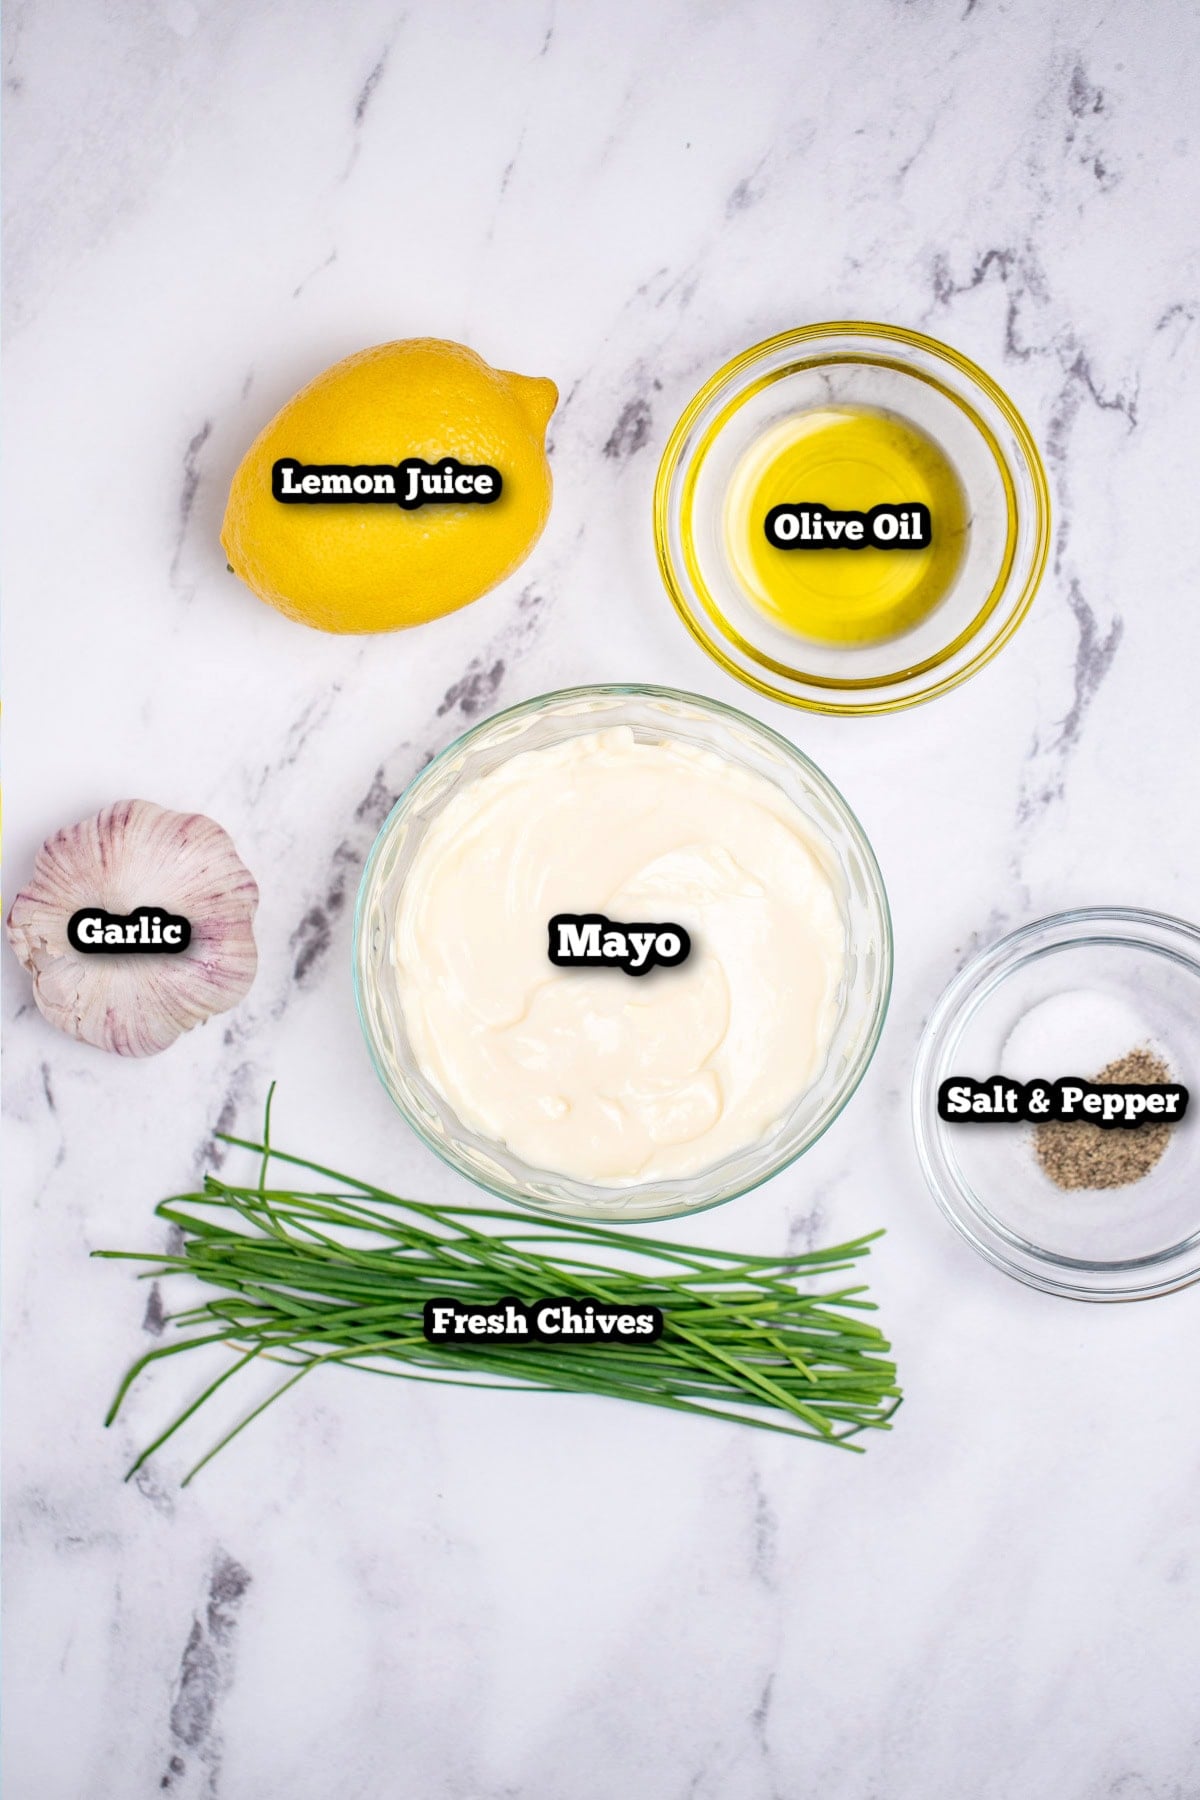
Garlic. You need an entire bulb of garlic, because we’re going to be roasting it whole. After it’s done, the garlic cloves should be soft enough to squeeze right out of the bulb. Just give it a little time to cool off first.
Extra Virgin Olive Oil. This helps thin out the sauce a bit while keeping the creamy texture. It’s also important for properly caramelizing the garlic.
You could also use vegetable oil or avocado oil.
Lemon Juice. This adds a nice fresh flavor, and the acidity helps balance out some of the savory notes. You could substitute this with apple cider vinegar.
Fresh Chives. I think fresh herbs add a nice flavor to the aioli. You could also use fresh dill or fresh parsley.
Salt & Pepper. Add kosher salt (or sea salt) and black pepper to-taste.
Kitchen Tools
For this recipe, you’ll need aluminum foil, a fork, a whisk, and a medium mixing bowl.
How to Make Roasted Garlic Aioli
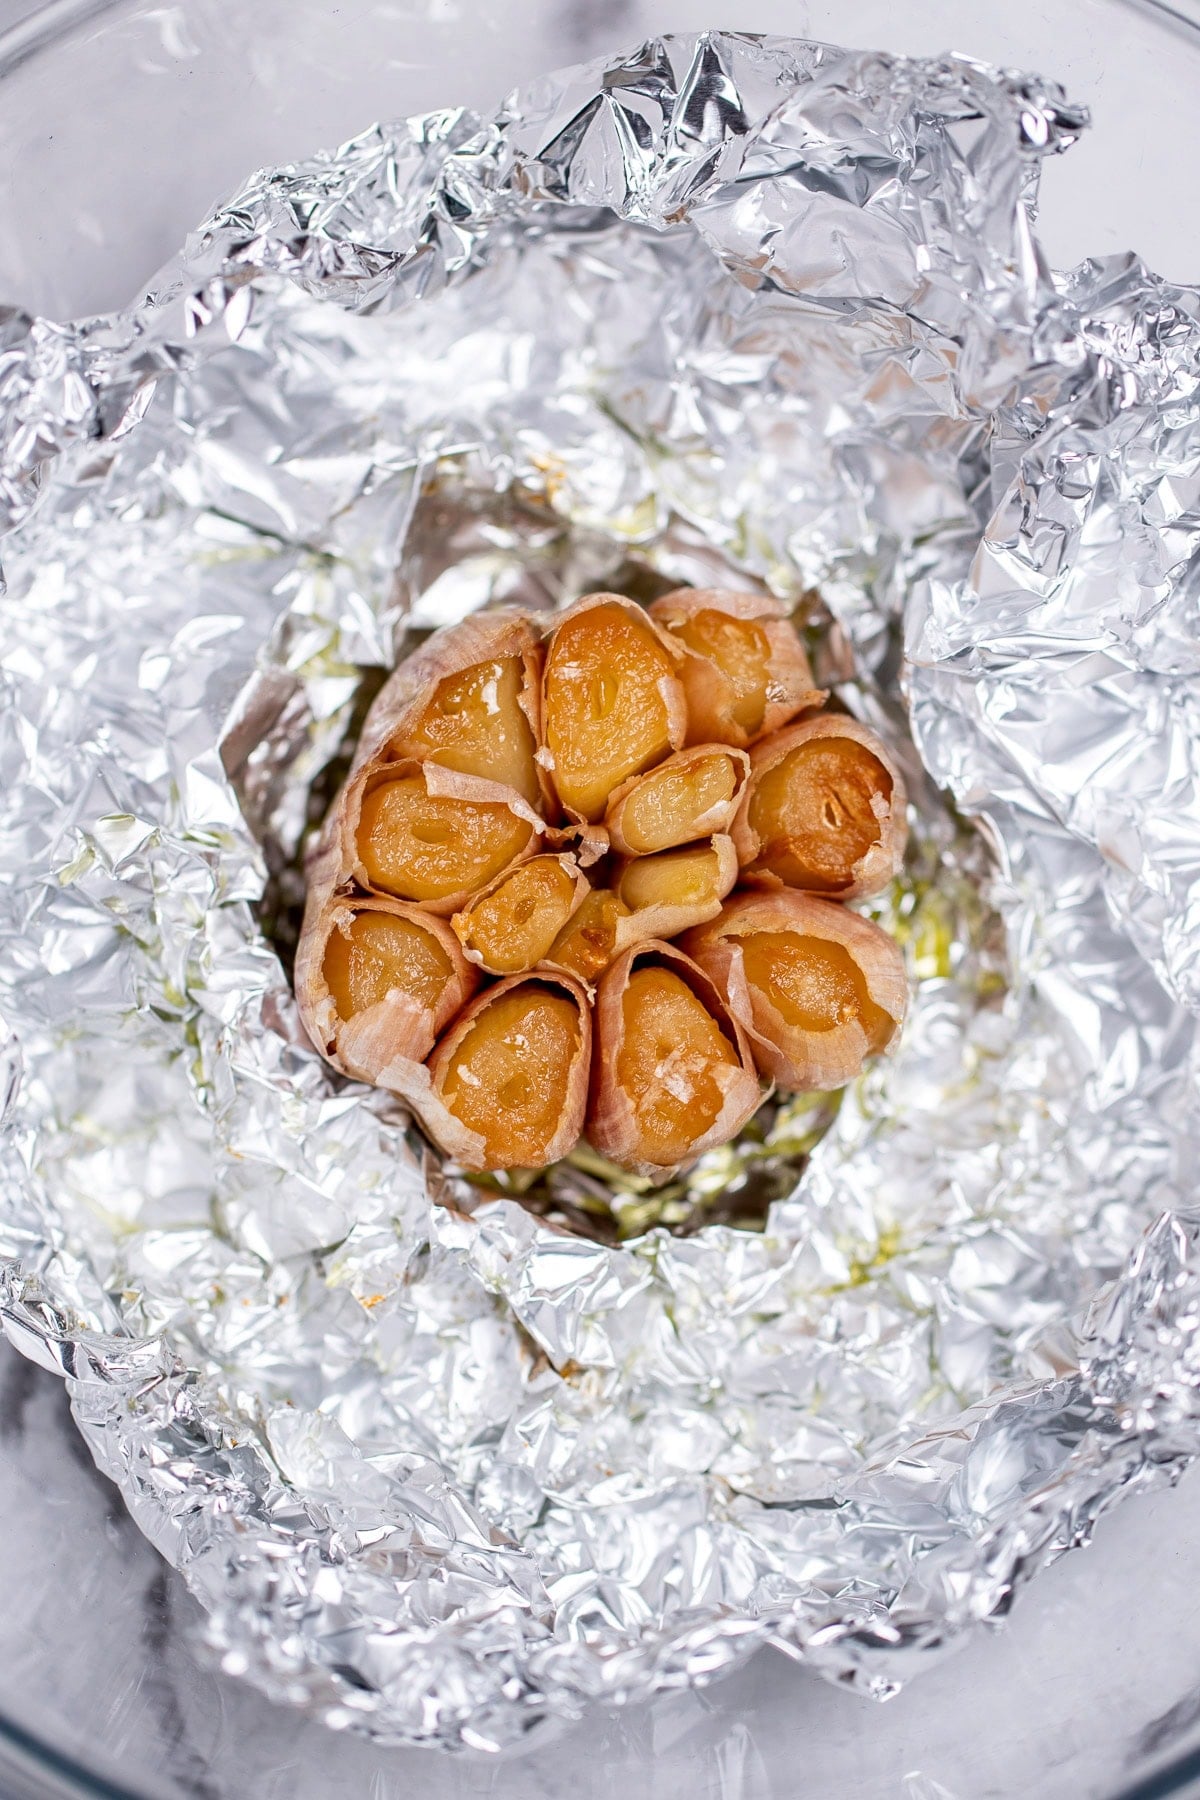
Preheat the oven to 400°F. Cut about 1/2-inch off of the top of the garlic bulb, enough to leave the cloves open. Leave the bulb intact and the skin on.
Place the garlic on the foil and drizzle with olive oil. Wrap the garlic tightly in the foil and place it on an oven rack. Roast the garlic for 25-30 minutes, or until the cloves are soft and a fork goes through easily.

Remove the garlic from the oven and let it cool enough to handle.
Once it’s cool, squeeze the roasted garlic cloves into a medium mixing bowl, and discard the rest of the bulb. Use a fork to mash the roasted cloves until soft.

Add all other ingredients to the bowl and whisk everything together until well-combined.
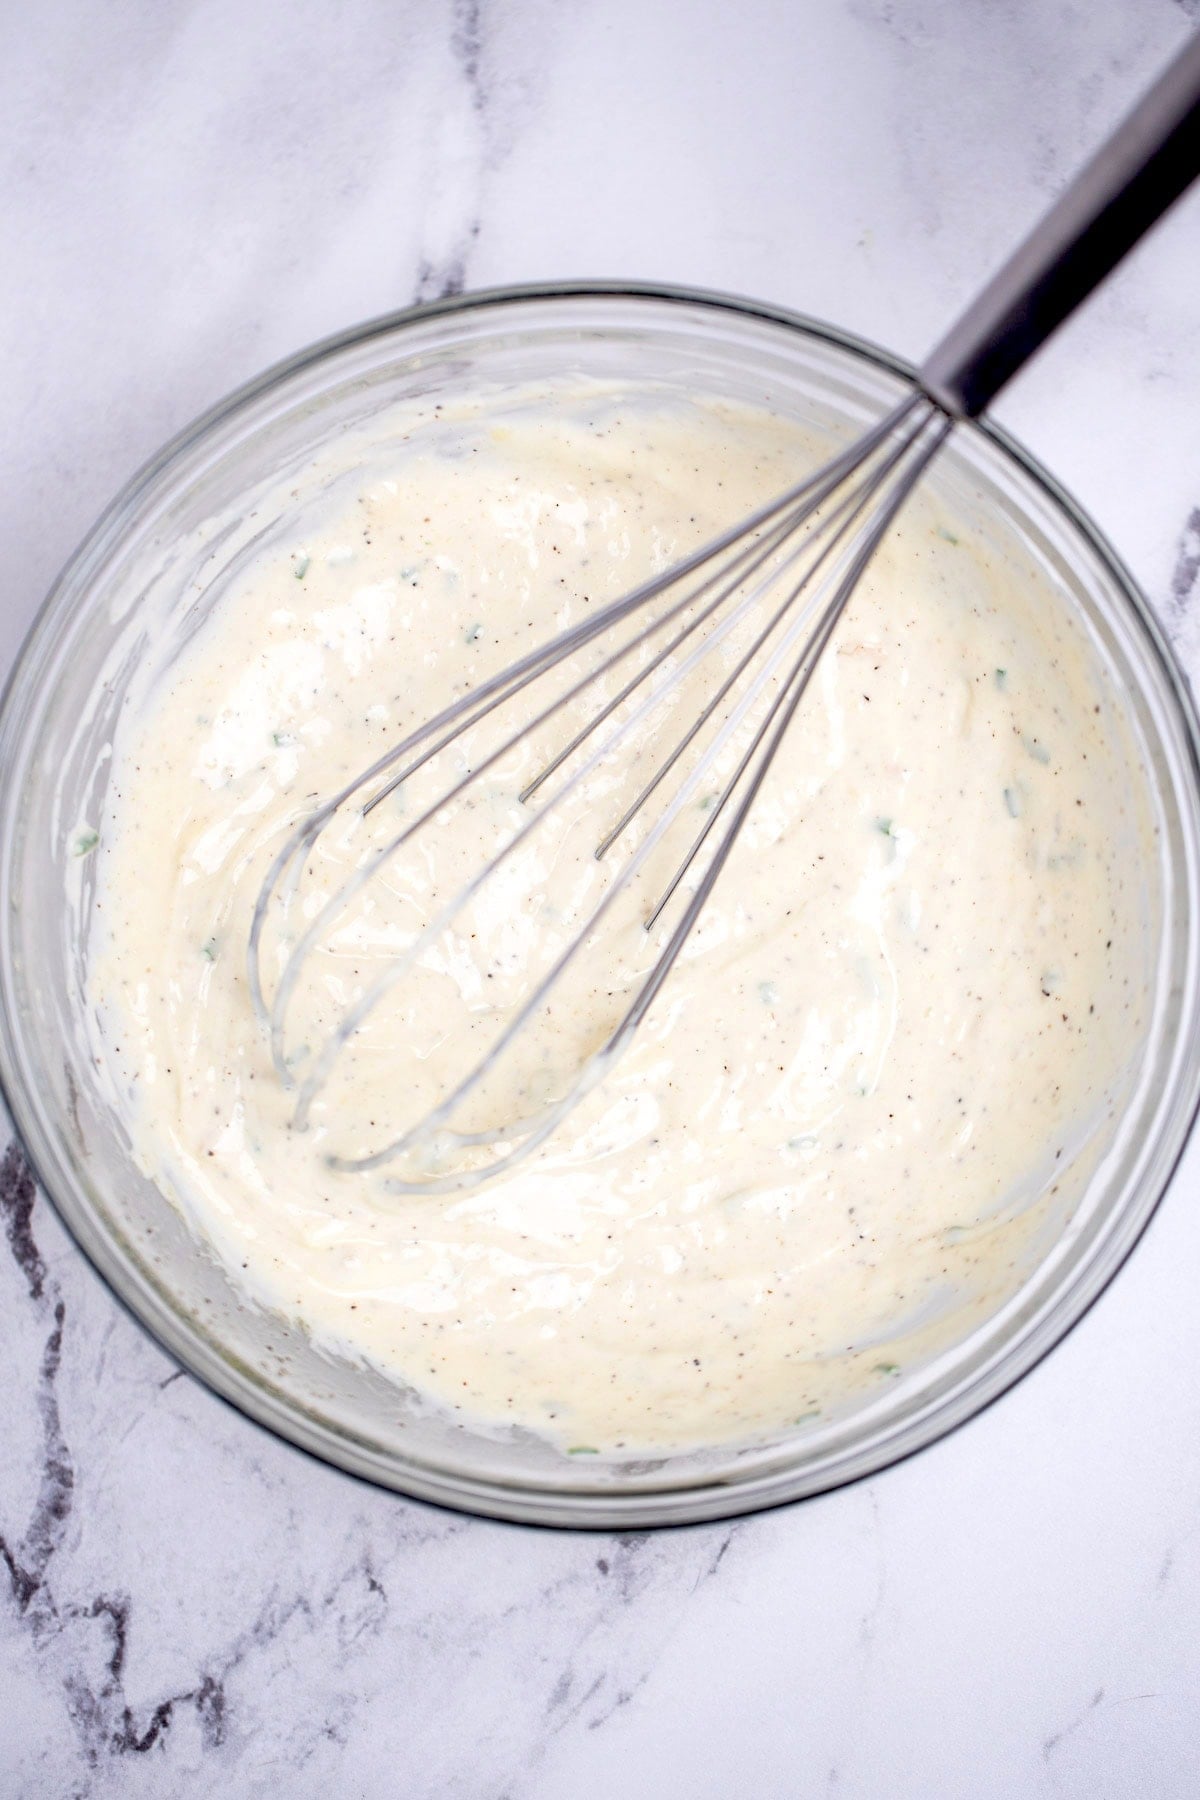
Adjust with any additional salt and pepper and serve.
Would you like to save this recipe?
Recipe Variations
- Make a spicy garlic aioli base with a dash of cayenne pepper, hot sauce, or red pepper flakes.
- Add other fresh herbs like parsley, dill, or basil depending on what you’re serving this with.
- Try adding other seasoning like chipotle seasoning, fajita seasoning, smoked paprika, Worcestershire sauce, or cumin and lime juice.
- For another version, try adding avocado and blending the aioli in a food processor until smooth.
Recipe Tip! The garlic bulb will be really hot after roasting. Let it cool until you can easily handle it.
Frequently Asked Questions
If your roasted garlic aioli turned out too thin, you can add more mayo (a little bit at a time) until it thickens. If it’s warm, refrigerate for 20-30 minutes to help it thicken some more as it cools.
If the aioli is too thick, try adding a little more lemon juice or olive oil, stirring until you reach the texture you’d like.
Recipe Tip! This recipe uses mayonnaise as its main aioli base. Use a brand that you know you like, because this will have a big impact on the flavor.
More Dressing and Sauce Recipes
- Easy Tartar Sauce
- Olive Garden Alfredo Sauce (copycat)
- Homemade Blue Cheese Dressing
- Buttermilk Ranch Dressing
Storage
Refrigerate roasted garlic aioli for 3-4 days in an airtight container.
I don’t recommend freezing this because the creamy texture may separate or become gritty. This recipe is better when made fresh or refrigerated.
Cooking Tips
- Use a fork to mash the garlic until there’s no big lumps. This will help create a really smooth texture in the aioli. You can also blend it all together in a food processor or with an immersion blender.
- If you’re worried about the garlic head leaking oil while it roasts in the oven, you can place it in a baking dish or with a sheet of aluminum foil on the oven rack below it.
- You can make this with garlic powder instead of roasted garlic, but you’ll only need maybe 1/2 teaspoon (add as-needed). Roasted garlic has a different flavor profile and is more mild than garlic powder.
- I like to use the entire head of garlic because I am a garlic lover. If you’re not sure, you can add about half of the garlic head and taste the aioli, then mash and add the rest if needed.
- If the roasted garlic is lumpy after mashing with a fork, mix the garlic with olive oil and whisk it together until there’s no more lumps. You can also use an immersion blender after everything is mixed together to fix any leftover lumps.
- The flavor gets better as the aioli sits in the refrigerator. I like to make this ahead of time, and store it in the refrigerator until we’re ready to eat.
Tried this recipe? ⭐ Leave a review and share what worked best for you—your tips help other home cooks get the same delicious results!

Roasted Garlic Aioli
Ingredients
Roast the Garlic
- 1 whole garlic bulb
- 1 tablespoon extra virgin olive oil
Make the Aioli
- 1 cup mayonnaise
- 2 tablespoons extra virgin olive oil
- 2 tablespoons lemon juice
- 1 tablespoon fresh chives, chopped
- 1/2 teaspoon kosher salt, or to taste
- 1/2 teaspoon black pepper, or to taste
Equipment
- 1 medium mixing bowl with a whisk and a fork
- aluminum foil
Instructions
- Preheat the oven to 400°F. Cut about 1/2-inch off the top of the garlic bulb, enough to leave the cloves open. Leave the rest of the bulb intact and the skin on.
- Place the garlic on the foil open-side-up and drizzle with olive oil. Wrap the garlic tightly in the foil and place it on the oven rack. Roast the garlic for 25-30 minutes, or until the cloves are soft and a fork goes through easily.
- Remove the garlic from the oven and let it cool enough to handle. Once it’s cool, squeeze the roasted garlic cloves into a medium mixing bowl, and discard the rest of the bulb. Use a fork to mash the roasted cloves until soft.
- Add all other ingredients to the bowl and whisk everything together until well combined. Adjust with any additional salt and pepper and serve.
Notes
- This recipe uses mayonnaise as its main aioli base. Use a brand that you know you like, because this will have a big impact on the flavor.
- Instead of mashing the garlic, you can blend it all together in a food processor or with an immersion blender.
- The flavor gets better as the aioli sits in the refrigerator. I like to make this ahead of time, and store it in the refrigerator until we’re ready to eat.
- The garlic bulb will be really hot after roasting. Let it cool until you can easily handle it.
Nutrition
Would you like to save this recipe?
We are a participant in both the RewardStyle and Amazon Services LLC Associates Program, which are affiliate advertising programs designed to provide a means for sites to earn advertising fees by advertising and linking to amazon.com and through RewardStyle.