Homemade Chocolate Ice Cream (No Churn!)
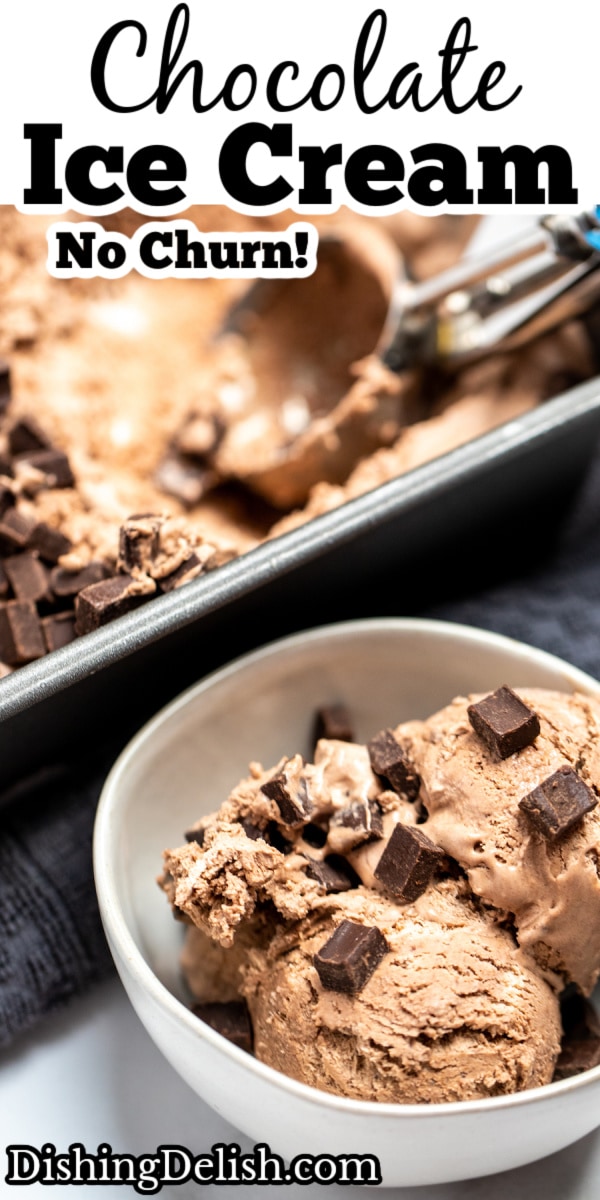
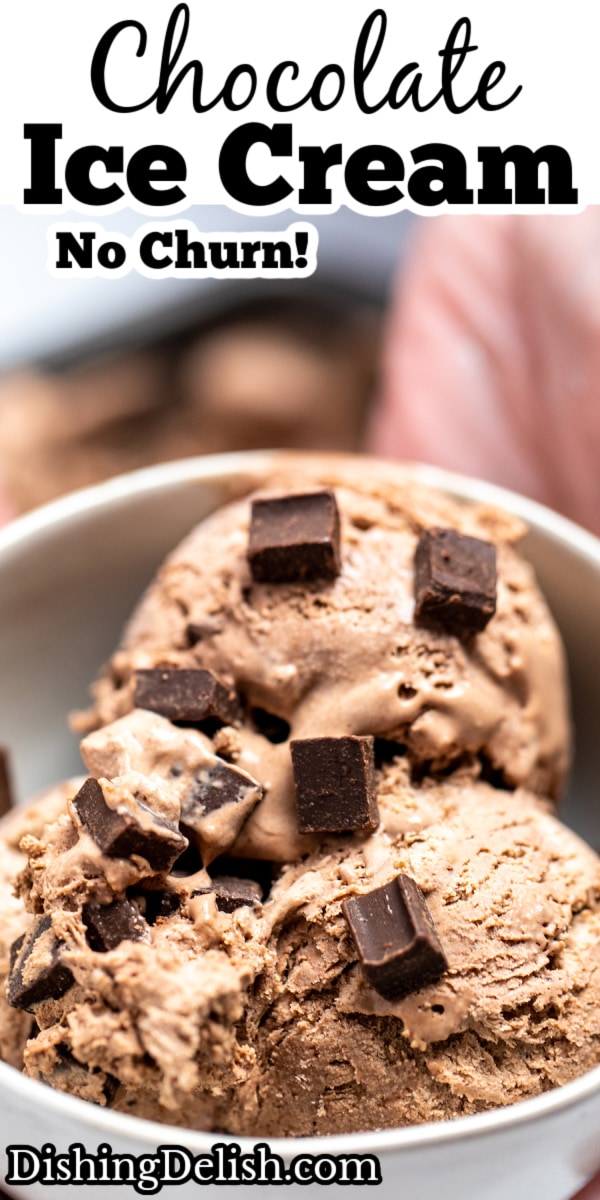
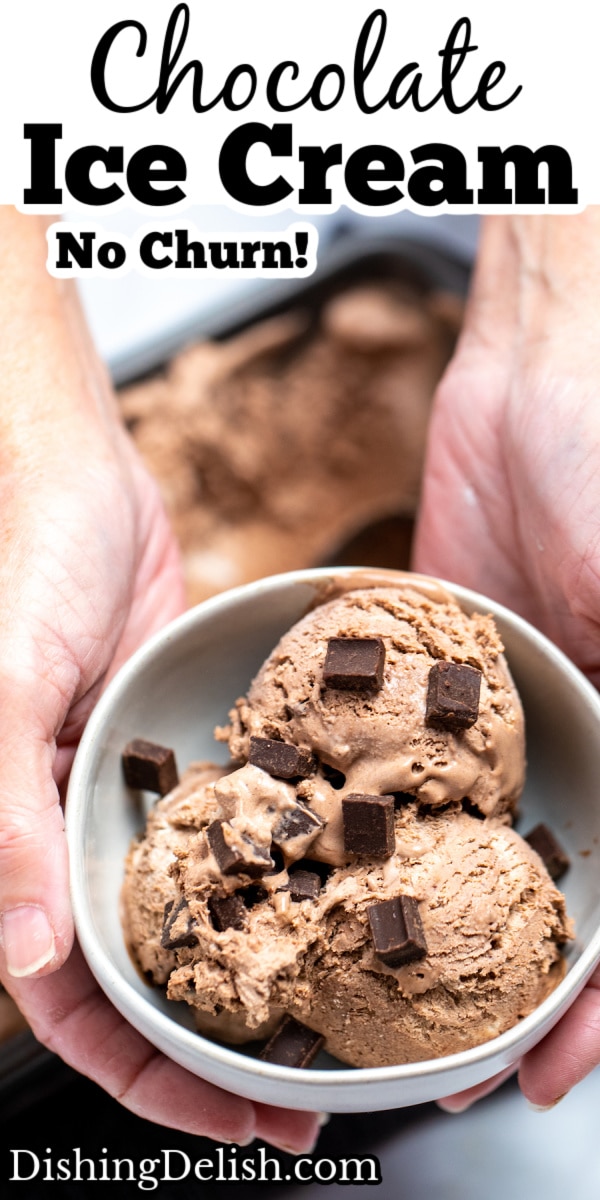
Homemade Chocolate Ice Cream is creamy and indulgent, made with a few simple ingredients like sweetened condensed milk, heavy whipping cream, cocoa powder, salt, and chocolate chips, without an ice cream maker!
For another homemade ice cream recipe, check out this No Churn Orange Ice Cream (just like a creamsicle with only a few basic ingredients)!
Homemade Chocolate Ice Cream has a creamy texture and a rich, decadent chocolate taste. It’s made with common pantry ingredients, so it comes together really quickly in a pinch. Plus you don’t need an ice cream machine for this recipe, technically making it a no churn chocolate ice cream!
I recommend making this chocolate ice cream recipe in the morning and freezing it, so it’s ready for dessert that night. You can also make it a few days ahead of time. If you’re a chocolate lover, this decadent ice cream will be one of your new favorite frozen treats. Once you make ice cream from scratch and see how easy it is to make, it’s hard to buy at the store!
Ingredients You’ll Need
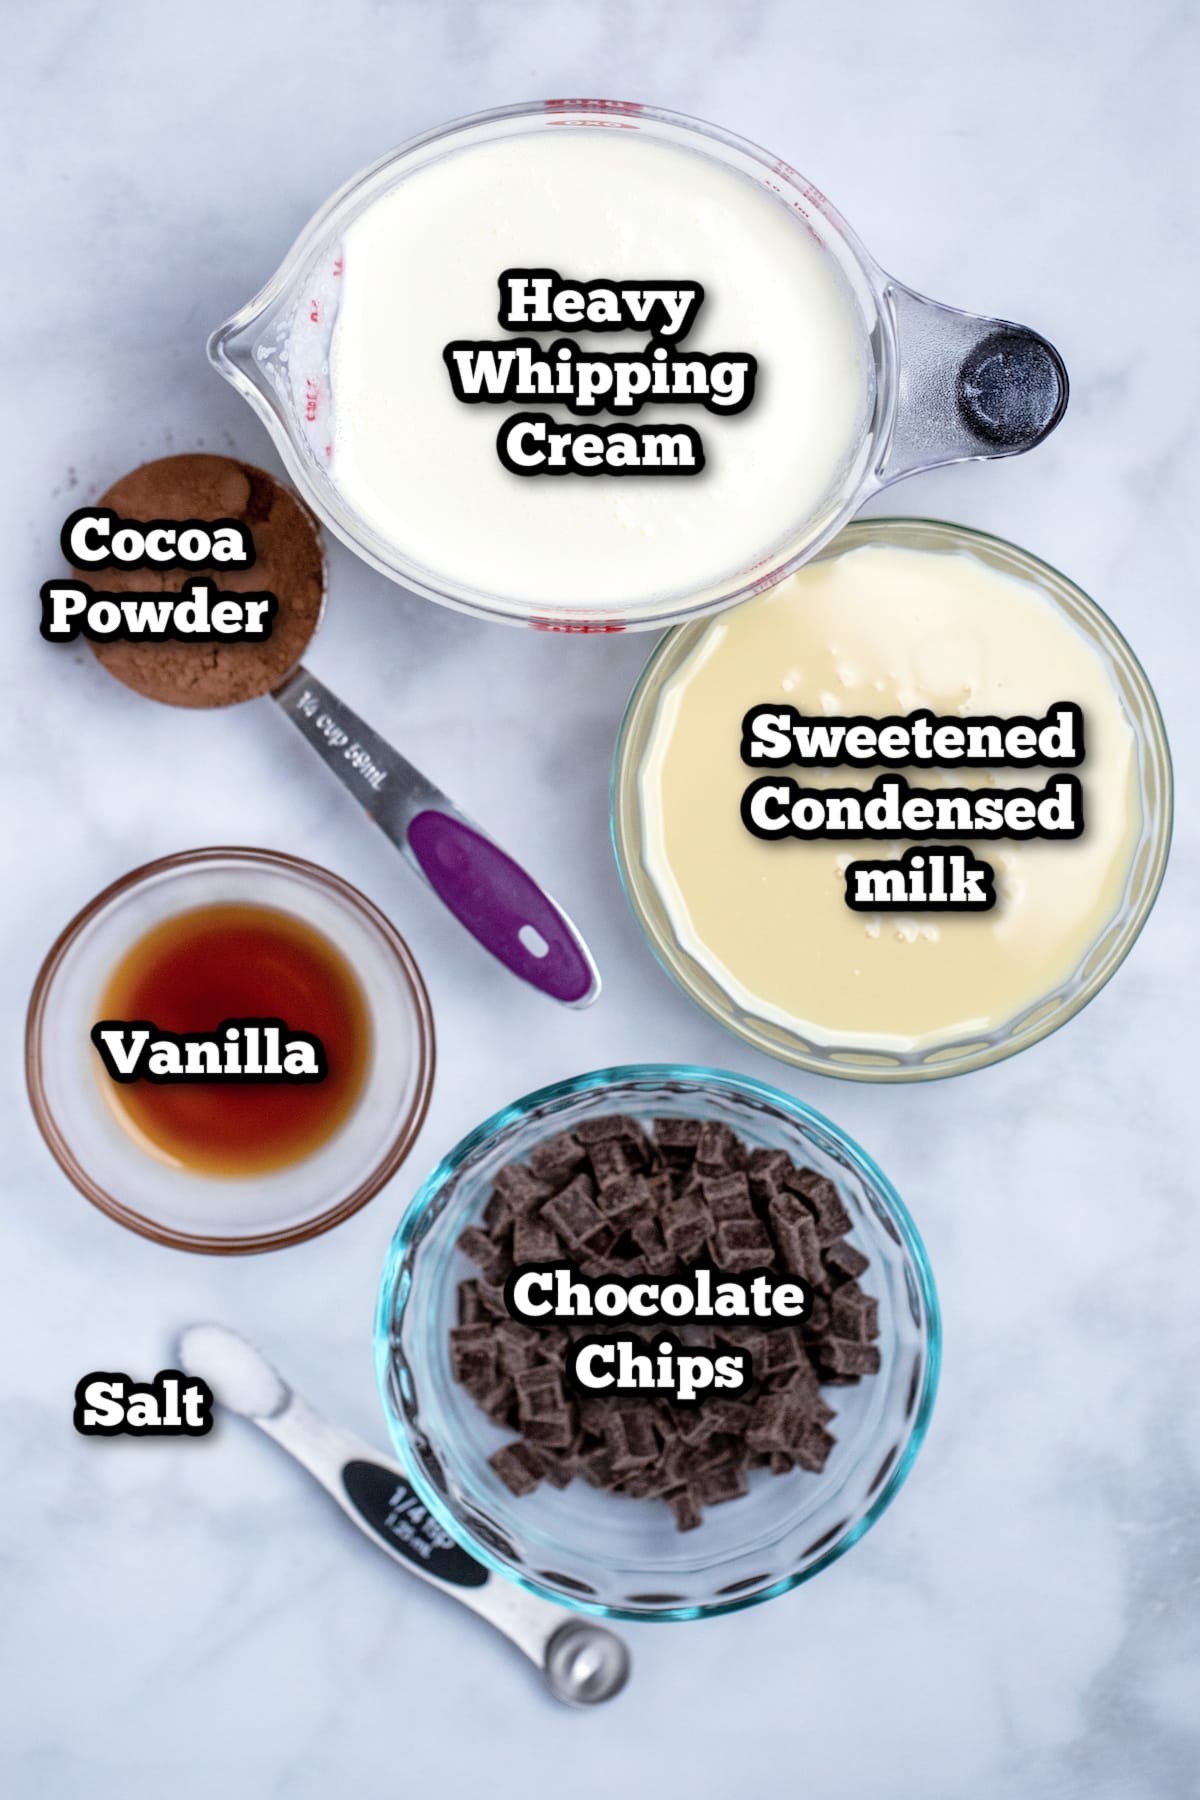
Sweetened Condensed Milk. The condensed milk helps add a really rich, creamy texture to the ice cream. This is a base ingredient so you can add a lot of different flavors! It’s already sweetened, so you don’t need granulated sugar.
Heavy Whipping Cream. We’re basically adding the creamy condensed milk base to whipped cream and folding everything together. Be careful not to over-whip the heavy cream which may result in a dense or gritty texture, stop when stiff peaks form.
Unsweetened Cocoa Powder. Cocoa powder is mixed with the sweetened condensed milk for a rich chocolate flavor.
Vanilla Extract. Vanilla flavor goes really well with the chocolate. You can add almond extract instead, or 1/2 teaspoon peppermint extract for a mint-chocolate ice cream on the holidays.
Salt. Salt helps balance out the sweetness of the ice cream base, so it’s not overly-sweet.
How to Make Homemade Chocolate Ice Cream
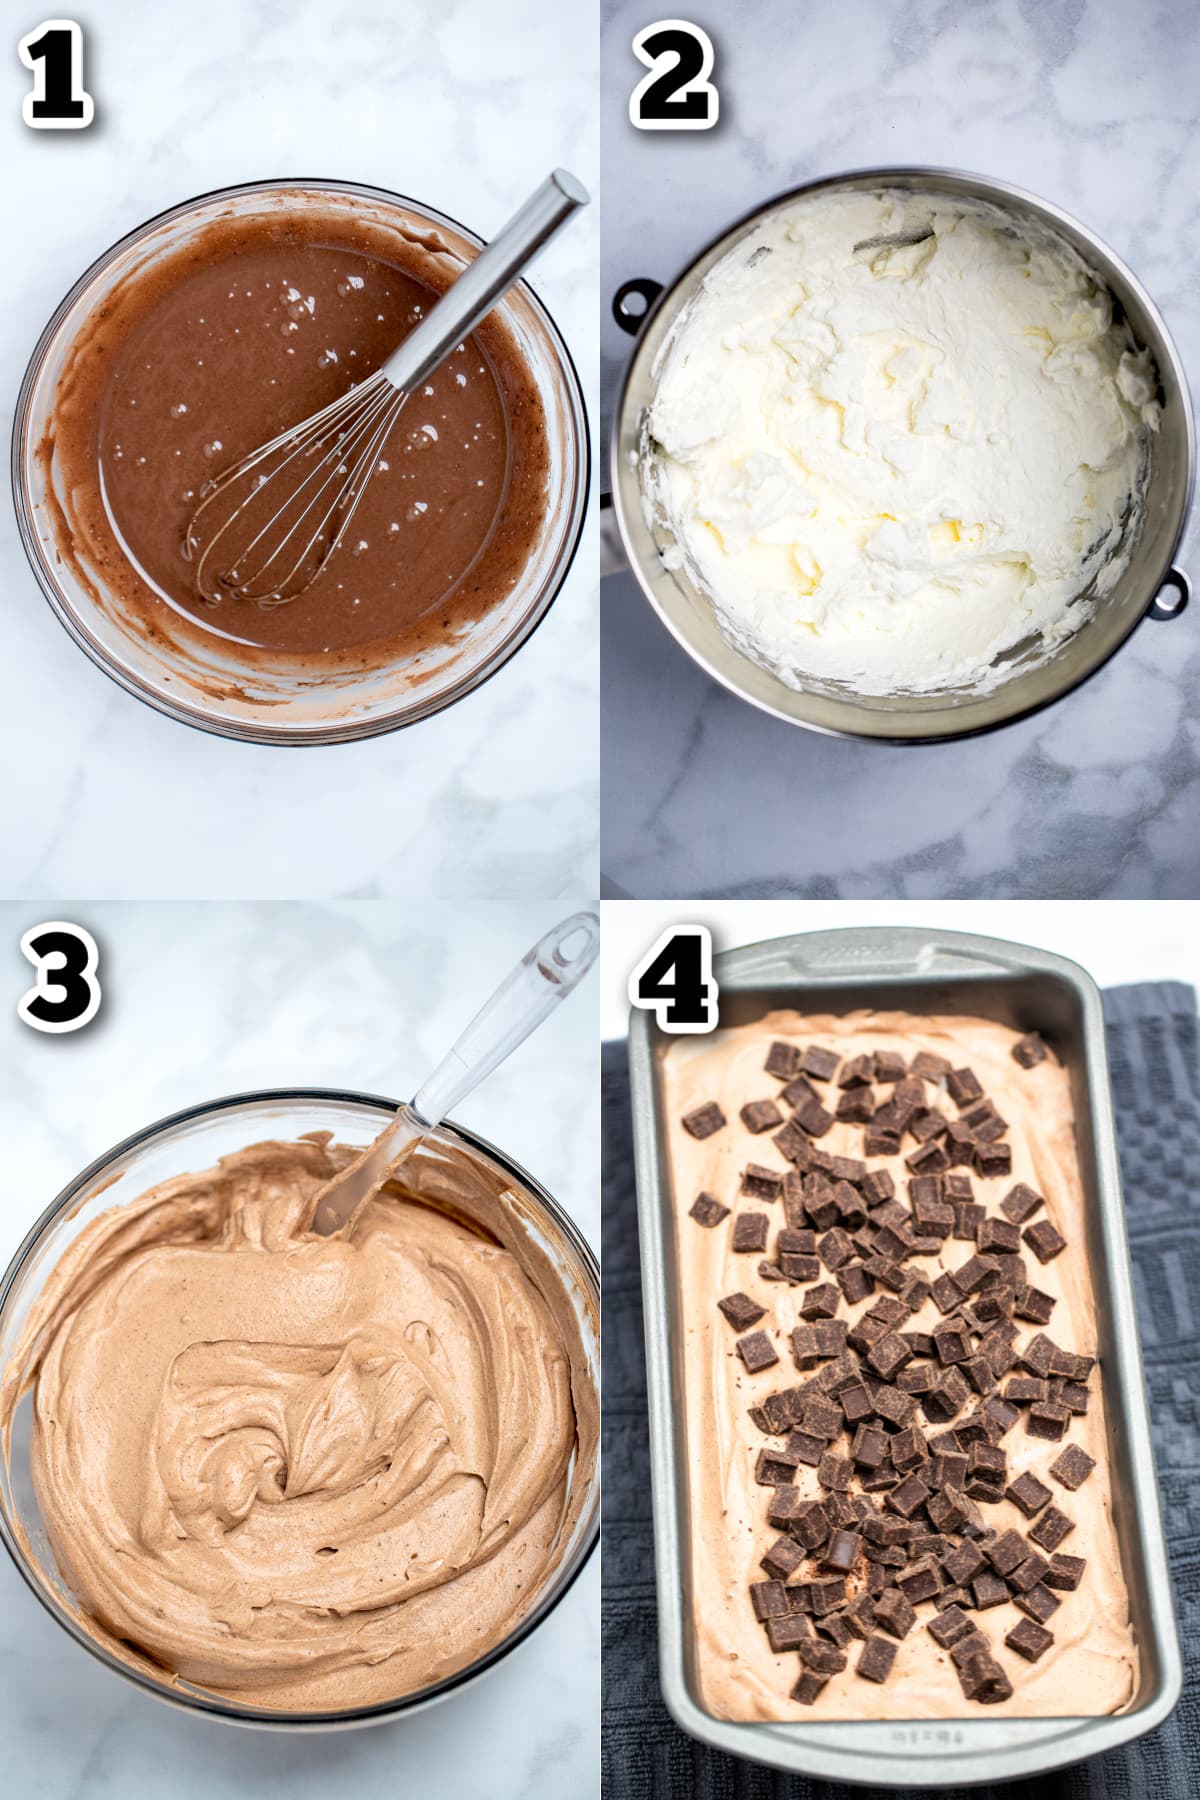
- In a medium bowl, whisk together the condensed milk, cocoa powder, vanilla extract, and salt until completely combined and the cocoa powder is saturated.
- Add the heavy cream to the stand mixer, using the whisk attachment, and beat on medium-high for 3-5 minutes. Keep going until the whipped cream forms stiff peaks.
- Use a spatula to gently fold half of the whipped cream into the chocolate ice cream base. When that’s combined, add the other half and fold together.
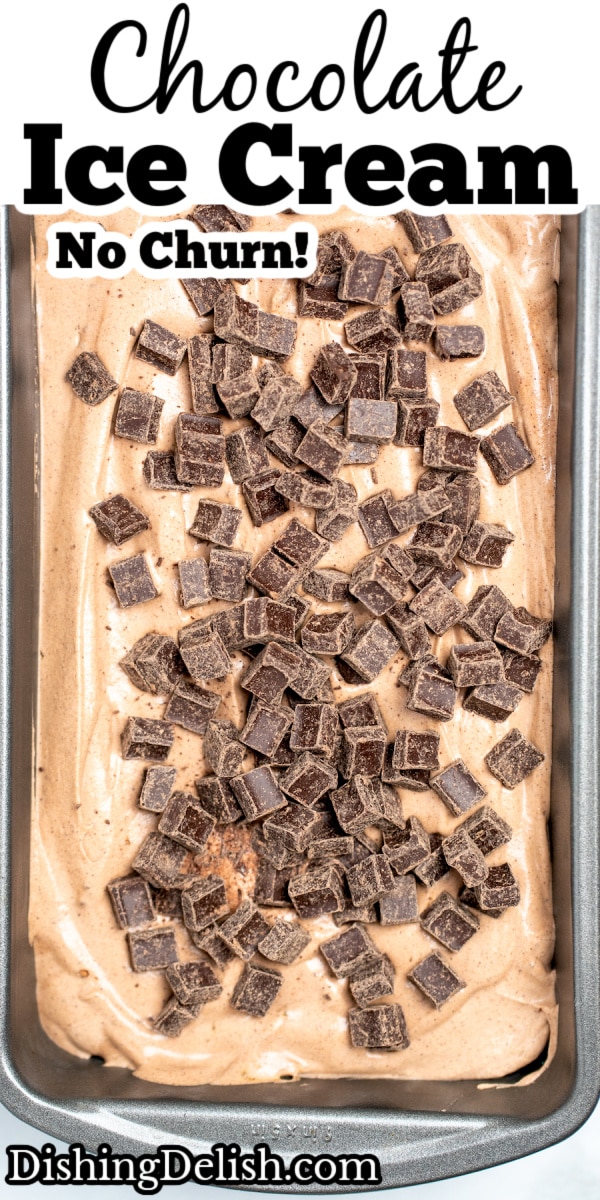
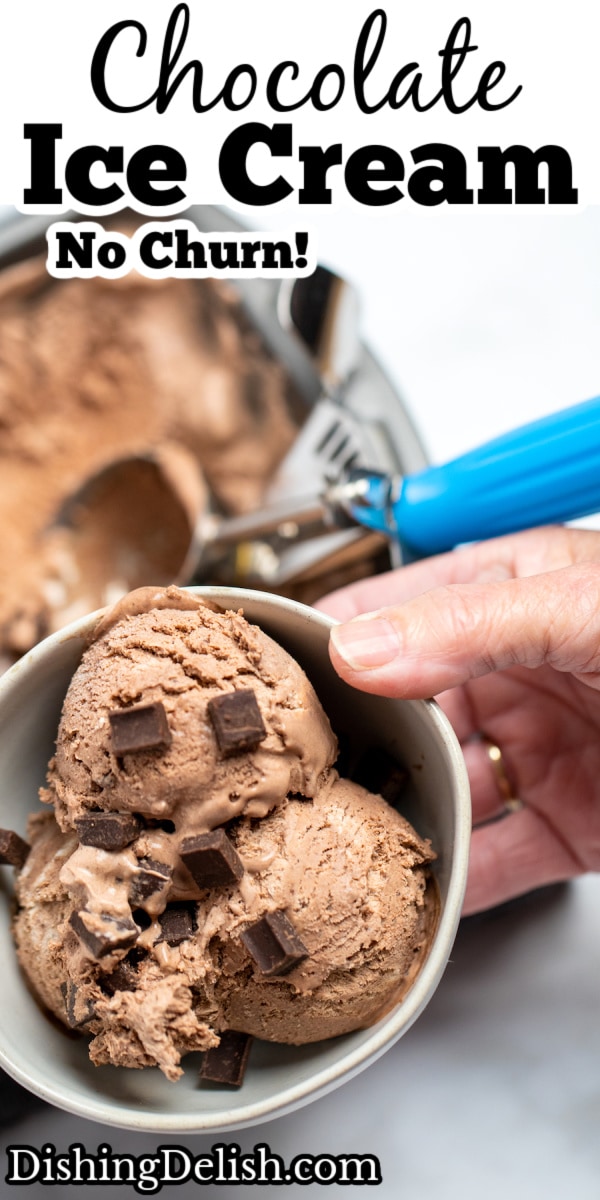
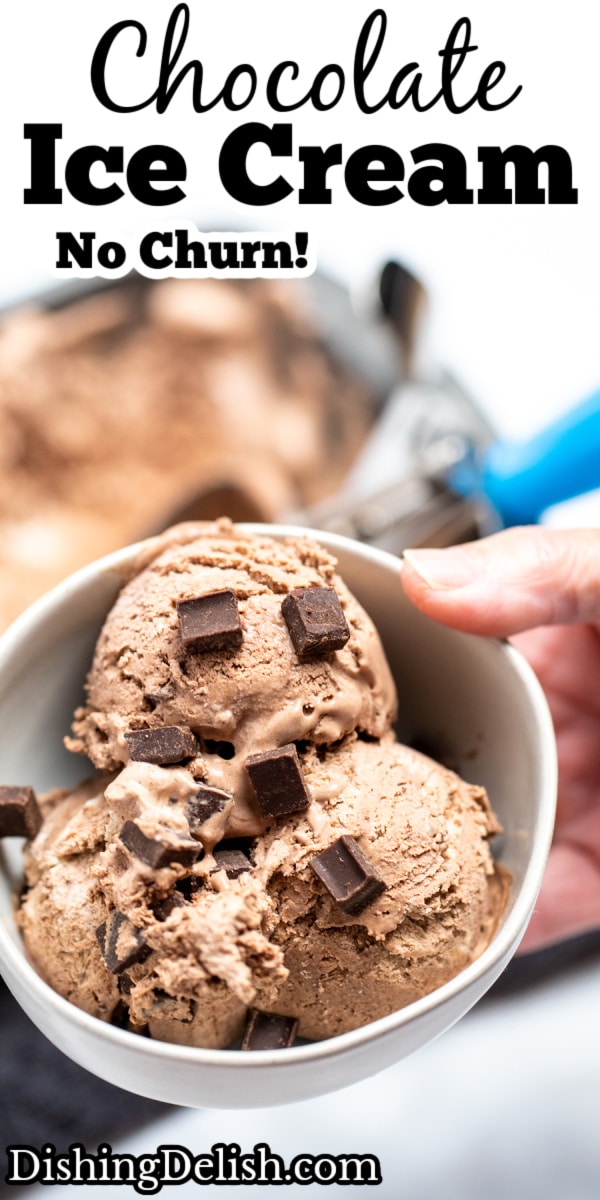
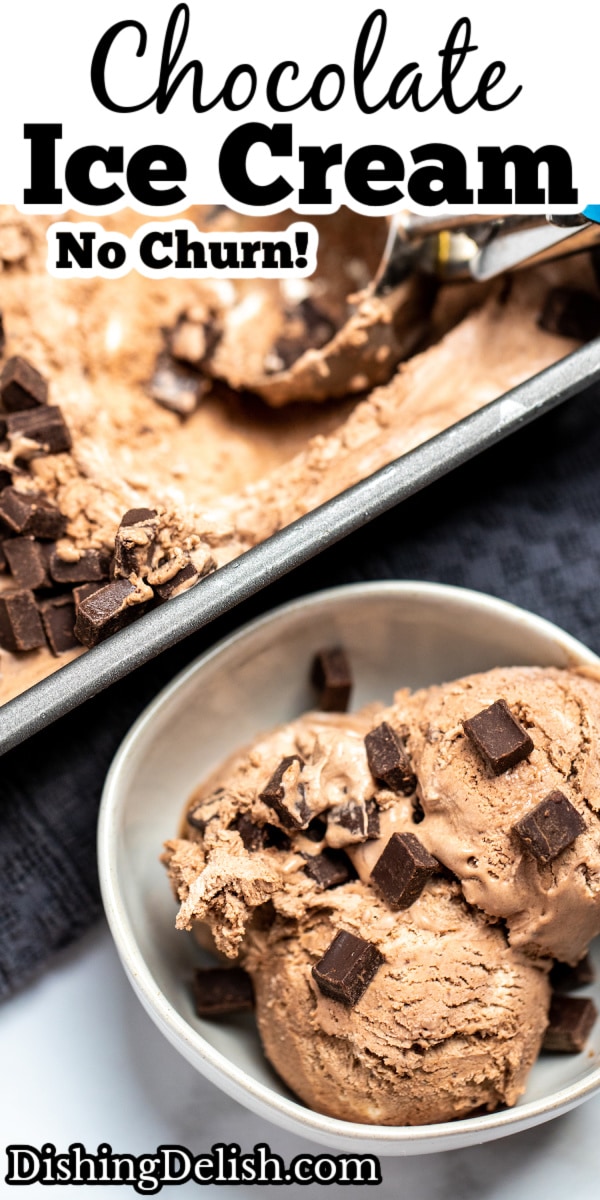
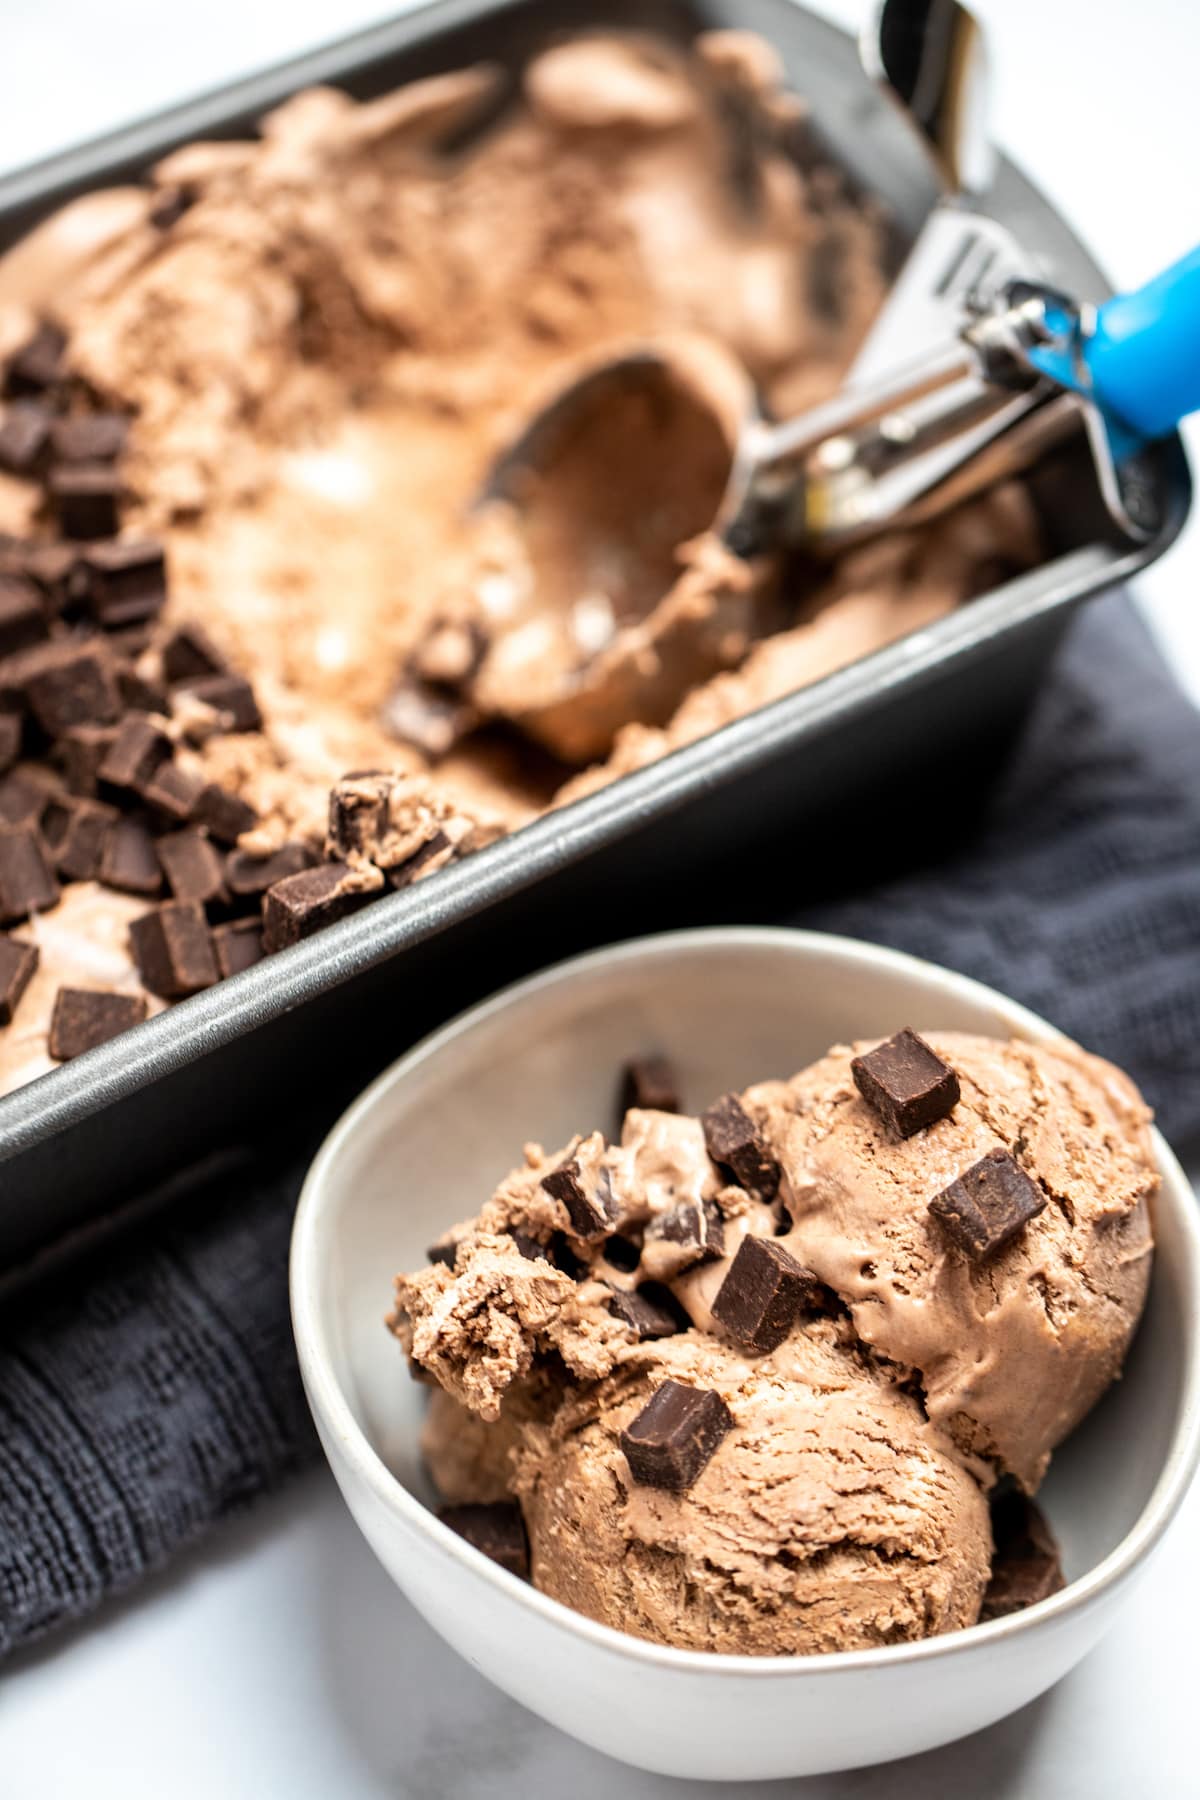
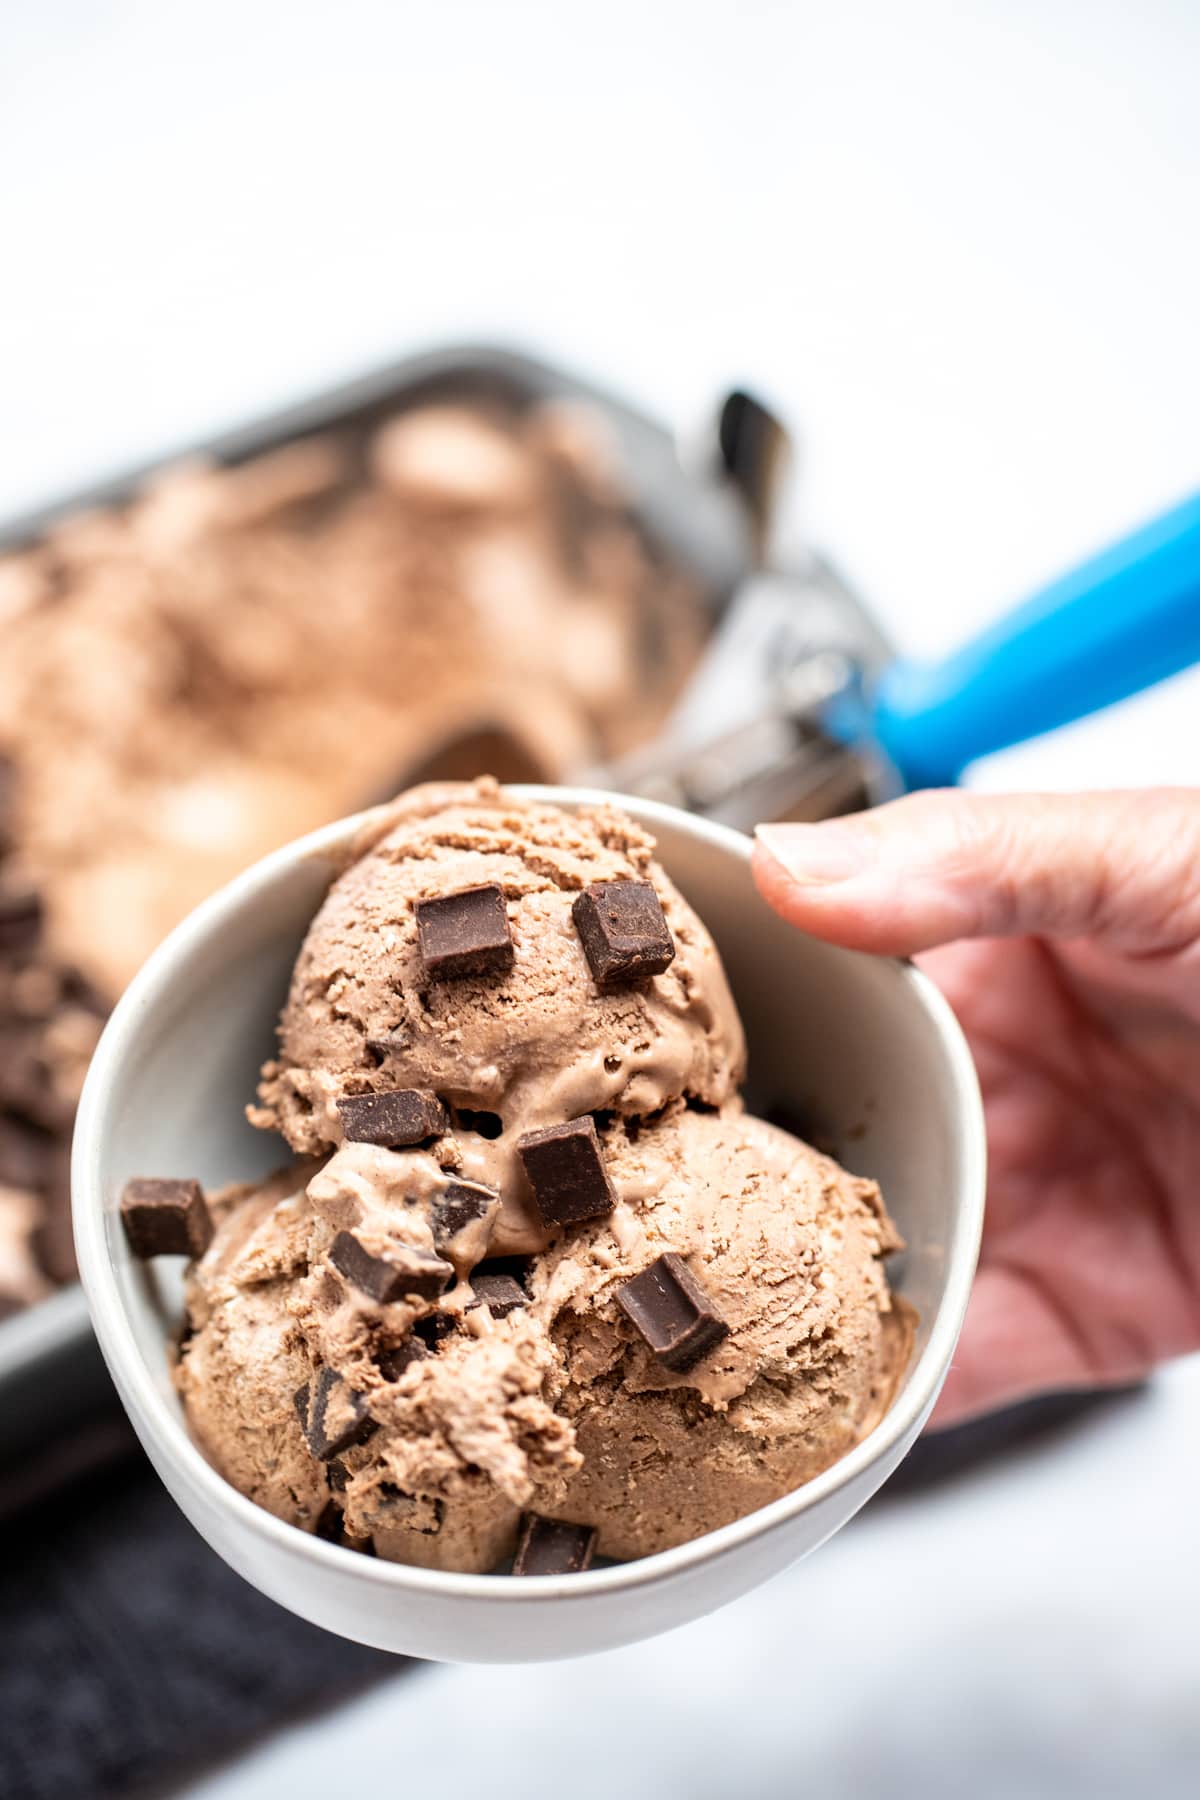
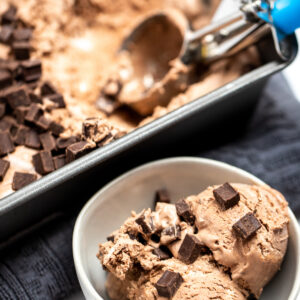
- Add the ice cream mixture to a freezer-safe container, smoothing evenly with a spatula. Top with chocolate chips evenly and wrap the pan tightly with plastic wrap. Freeze for 4-5 hours, or until completely frozen.
More Chocolate Recipes
- Fudgy Gluten Free Brownies (Use the leftovers from this recipe to add brownie bits to your chocolate ice cream mixture!)
- Easy Peppermint Chocolate Cookies
- Chocolate Coffee Cake
- Double Chocolate Donuts
Would you like to save this recipe?
Frequently Asked Questions
Can you freeze chocolate milk and make chocolate ice cream?
No, what you’d get by freezing chocolate milk is more of a chocolate ice or sorbet. Milk is made up of too much water for it to freeze to a creamy consistency. This is why ice cream recipes usually contain cream (much higher fat content) and sugar (a solid that balances out how much water is in the milk). Or in this case, sweetened condensed milk, where the water was already cooked out before being canned.
What does cocoa powder do in ice cream?
Chocolate is usually made up of cocoa powder and sugar for flavor, and a fat source (usually cocoa butter). This recipe gets its sweetness from sweetened condensed milk, and it’s fat from the whipped cream, so all we need to add for a rich chocolate flavor is cocoa powder.
What type of cocoa powder is best for ice cream?
Honestly, this comes down to personal preference. If you’re a dark chocolate fan, use a dark cocoa powder, you’ll get a nice deep chocolate flavor which is lower in sweet notes and higher in bitter notes. I personally like a regular unsweetened dutch process cocoa powder, which you can find in the baking section of your grocery store.
Storage
Store your homemade ice cream in an airtight container in the freezer for up to 2 weeks.
Recipe Variations
- If you want chocolate chips throughout the batch of ice cream instead of on top, freeze the mixture for about 2 hours, then take it out while it’s semi-frozen but soft, and stir the chocolate chips in, and put it back into the freezer for 2-3 more hours.
- Add a small amount of brown sugar for flavor.
- Add a few tablespoons of peanut butter or powdered peanut butter for a chocolate peanut butter ice cream. This would have a really nice smooth texture! Or mix in some broken up peanut butter cups or candy bars (make sure they’re gluten free).
- Top with gluten free caramel sauce and flakey sea salt for a caramel chocolate version! If you need a good caramel sauce recipe, check out the one in my Salted Caramel Milkshake recipe.
- You can make no churn vanilla ice cream by just leaving the cocoa powder out of the condensed milk mixture. Or add 1/2 teaspoon peppermint extract to the milk mixture for a mint chocolate chip!
- Add some frozen pitted cherries and a splash of cherry juice to the cocoa mixture for a chocolate cherry version.
- Add mini marshmallows (check that they’re gluten free), and chopped walnuts for rocky road ice cream.
Cooking Tips
- This no-churn ice cream is naturally gluten free but always double check the brand of ingredient that you’re using, to be on the safe side.
- You can’t really over-mix the condensed milk portion, but you can over-mix the whipped cream. Be careful, you still want it to be light and fluffy, so just fold it gently when combining. Over-mixing can result in ice crystals instead of a creamy ice cream texture.
- I’ve used both plastic wrap and aluminum foil to wrap the pan before putting it in the freezer. I think the plastic wrap worked better, but both ways turned out fine.
- If you don’t have a stand mixer, you can use a regular electric hand mixer. This doesn’t really require any special equipment.
- I used chocolate chunks, but you can also use regular or mini chocolate chips. Or leave them out entirely and just enjoy a plain chocolate ice cream.
- Dip your ice cream scoop in hot water before scooping, to help make it easier.
Tried this recipe? ⭐ Leave a review and share what worked best for you—your tips help other home cooks get the same delicious results!
Homemade Chocolate Ice Cream (No Churn!)
Equipment
- 1 Stand mixer (whisk attachment)
- 1 bread pan
Ingredients
- 14 oz sweetened condensed milk
- 1 tablespoon vanilla extract
- 1/4 cup unsweetened cocoa powder
- 1/4 teaspoon salt
- 2 cups heavy whipping cream
- 1 cup chocolate chips, gluten free
Instructions
- In a medium bowl, whisk together condensed milk, cocoa powder, vanilla extract, and salt until completely combined.
- Add the heavy cream to the stand mixer, using the whisk attachment, and beat on medium-high for 3-5 minutes, until the whipped cream forms stiff peaks.
- Use a spatula to gently fold half of the whipped cream into the chocolate mixture. When that's combined, add the other half and gently fold together.
- Add the ice cream mixture into a bread pan, smoothing evenly with a spatula. Top with chocolate chips and wrap the pan tightly with plastic wrap. Freeze for 4-5 hours, or until completely frozen.
Notes
- You can’t really over-mix the condensed milk portion, but you can over-mix the whipped cream. Stop when stiff peaks just form.
- Be careful when folding together, you still want it to be light and fluffy, so just fold it gently when combining.
- If you don’t have a stand mixer, you can use a regular electric hand mixer. This doesn’t really require any special equipment.
Nutrition
Would you like to save this recipe?
We are a participant in both the RewardStyle and Amazon Services LLC Associates Program, which are affiliate advertising programs designed to provide a means for sites to earn advertising fees by advertising and linking to amazon.com and through RewardStyle.