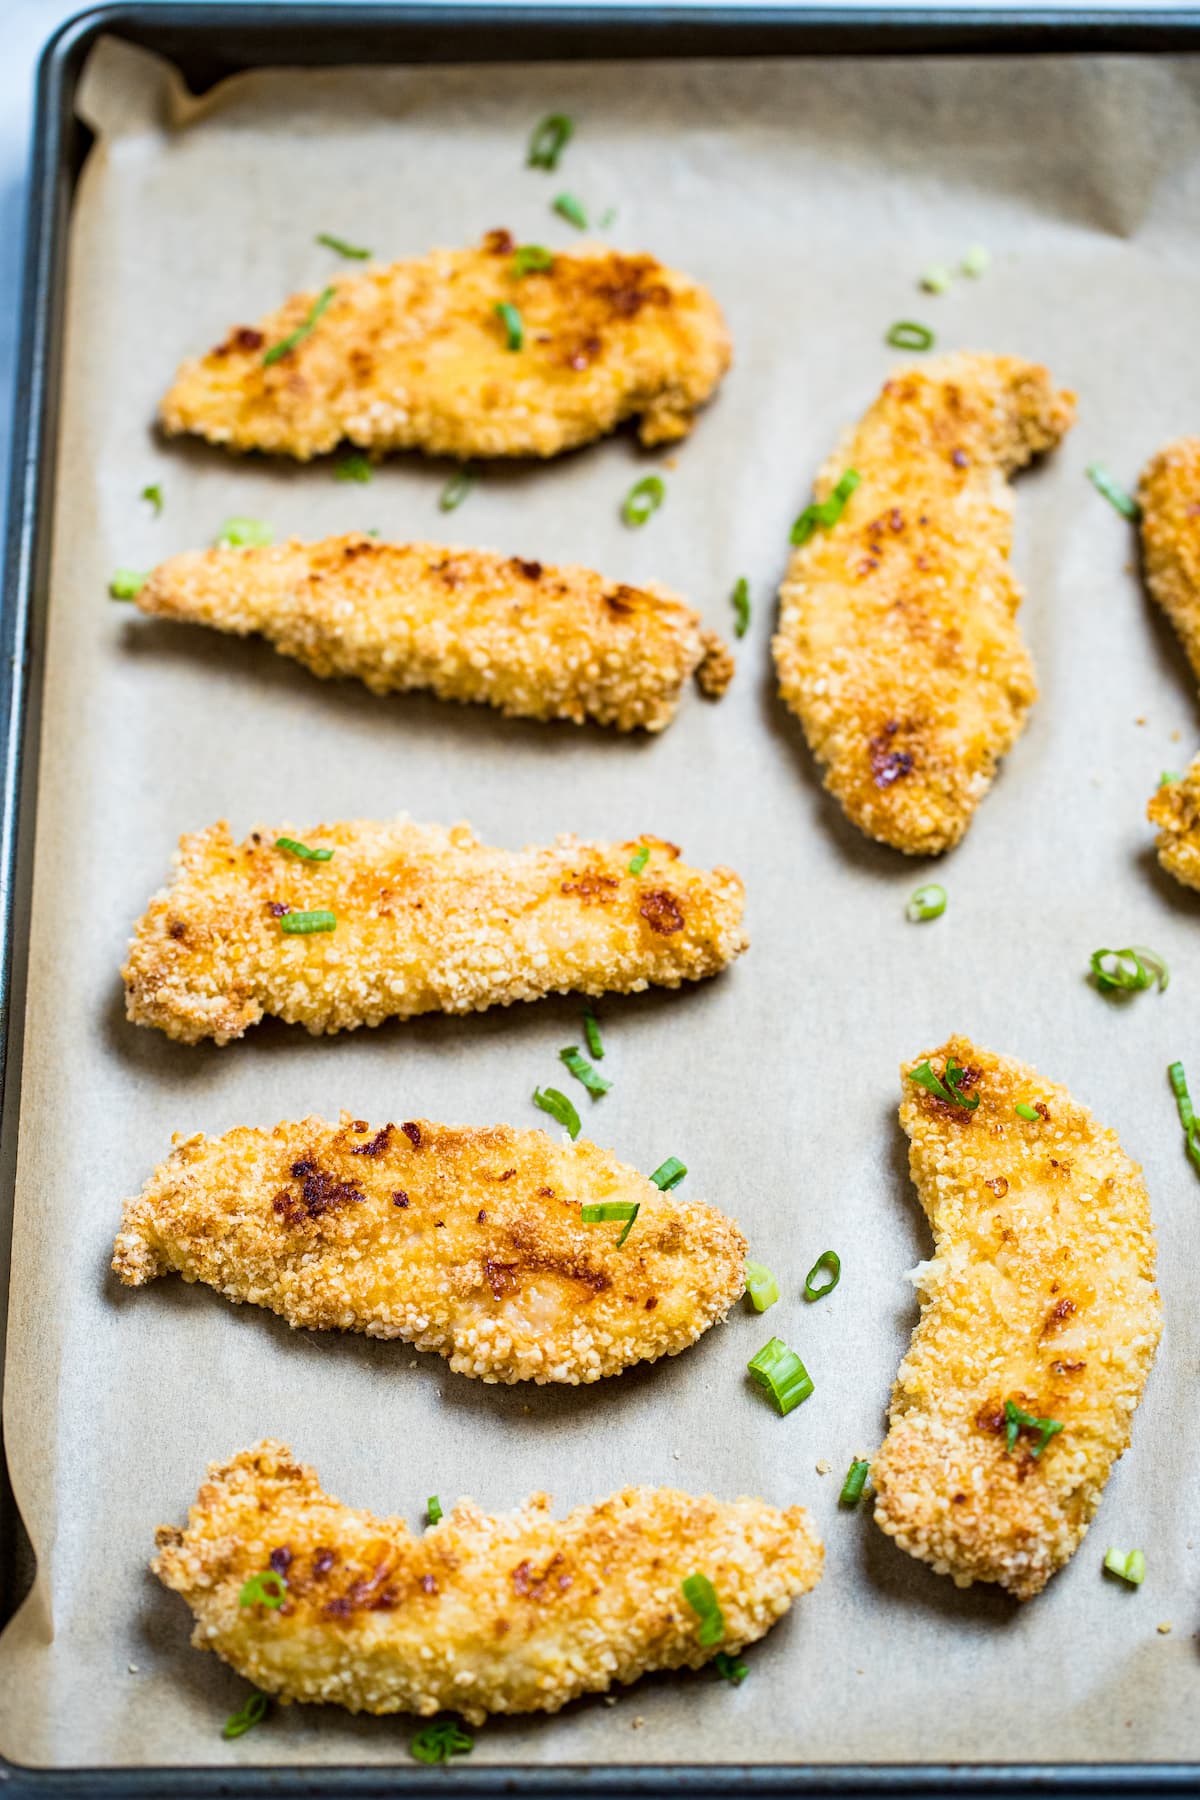
Baked Chicken Tenders
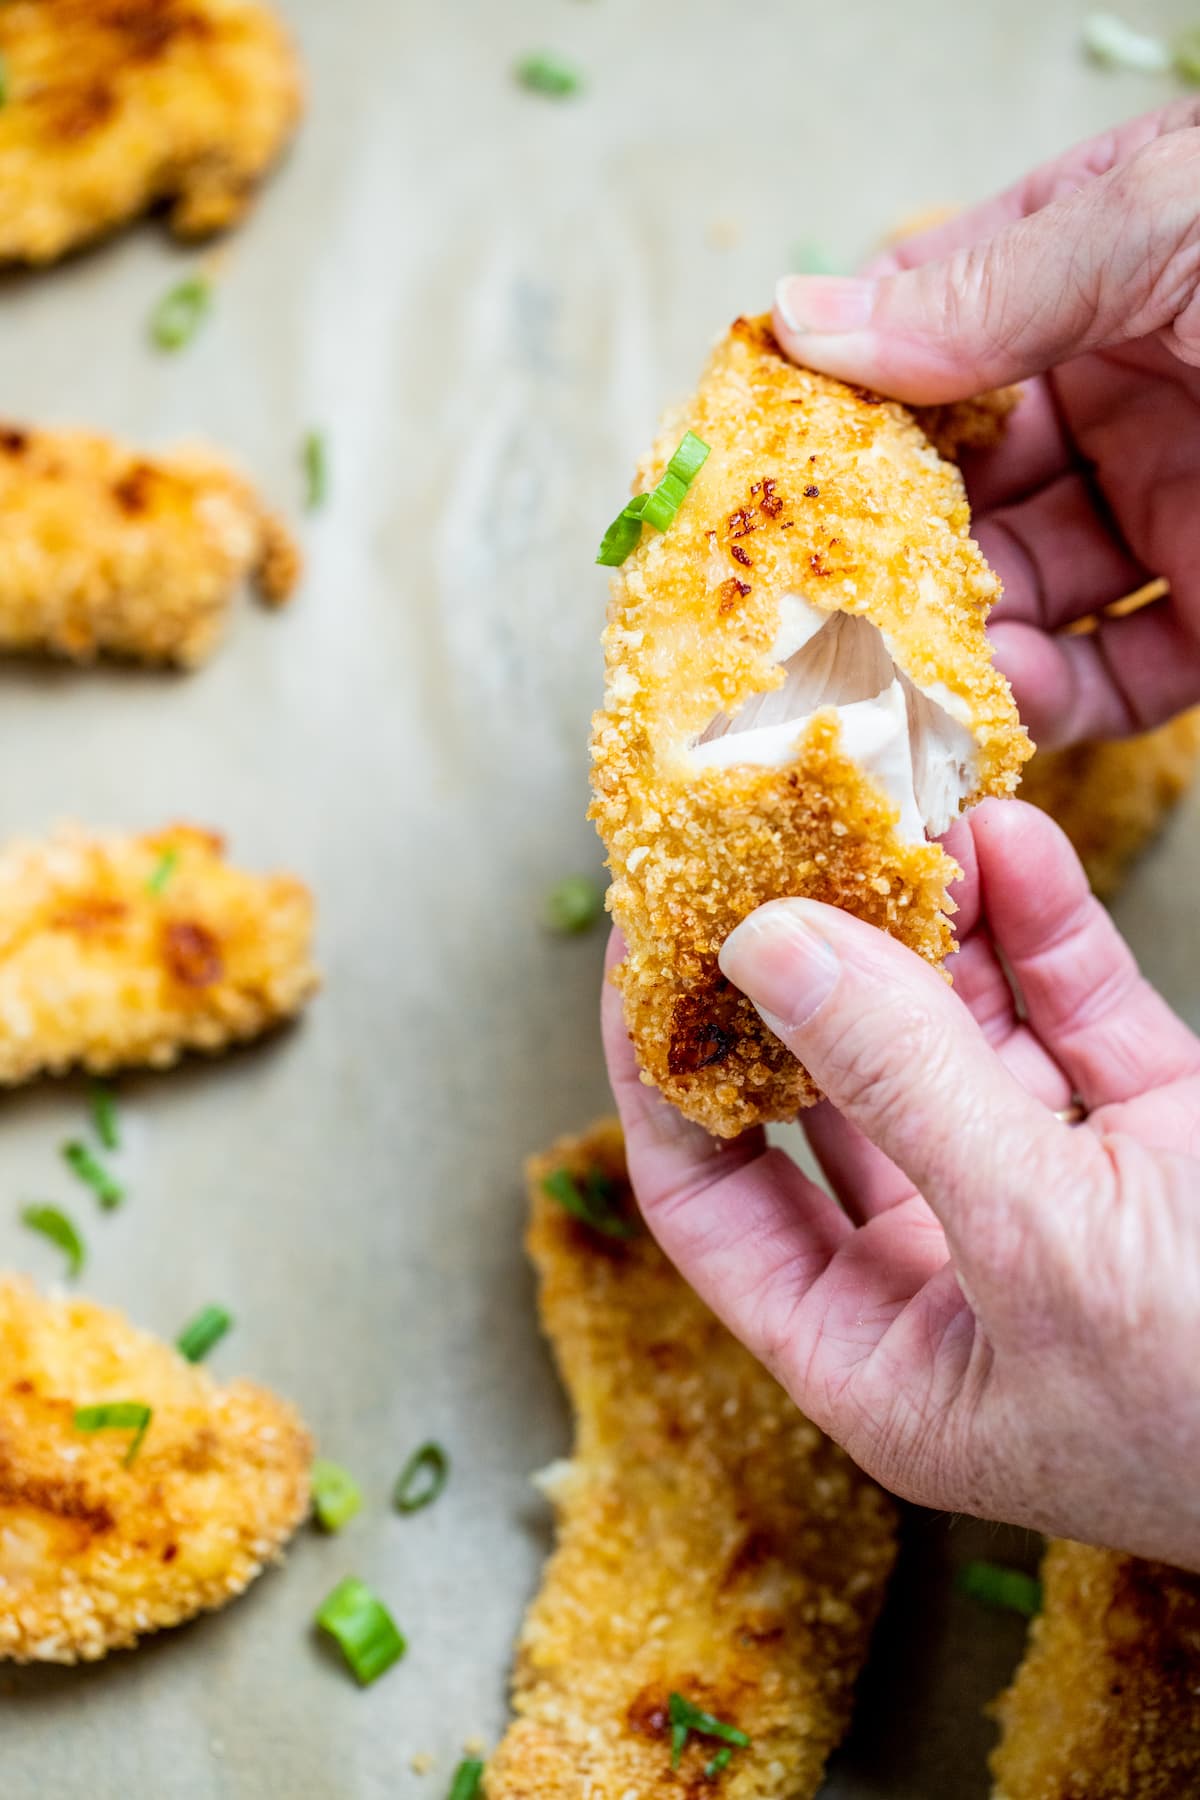
Baked Chicken Tenders are juicy on the inside and crispy on the outside, made with chicken tenderloins coated in gluten free breadcrumbs and a blend of spices, ready in under 45 minutes!
I’m not a big fan of frying in oil because it’s a lot of cleanup afterwards. Which is why I love these baked and air fried options! Check out Crispy Oven Fried Pork Chops, Air Fryer Chicken Tenders, and Crispy Oven Fried Chicken Thighs!
Baked Chicken Tenders are a staple weeknight dinner in this house, because they’re quick and easy to make with simple ingredients, and there’s rarely any leftovers. You can serve them with your favorite dipping sauces like honey mustard, ranch dressing, or bbq sauce.
These chicken fingers are great served with Cheesy Mashed Potatoes or Crispy Garlic Parmesan Roasted Potatoes!
Ingredients You’ll Need
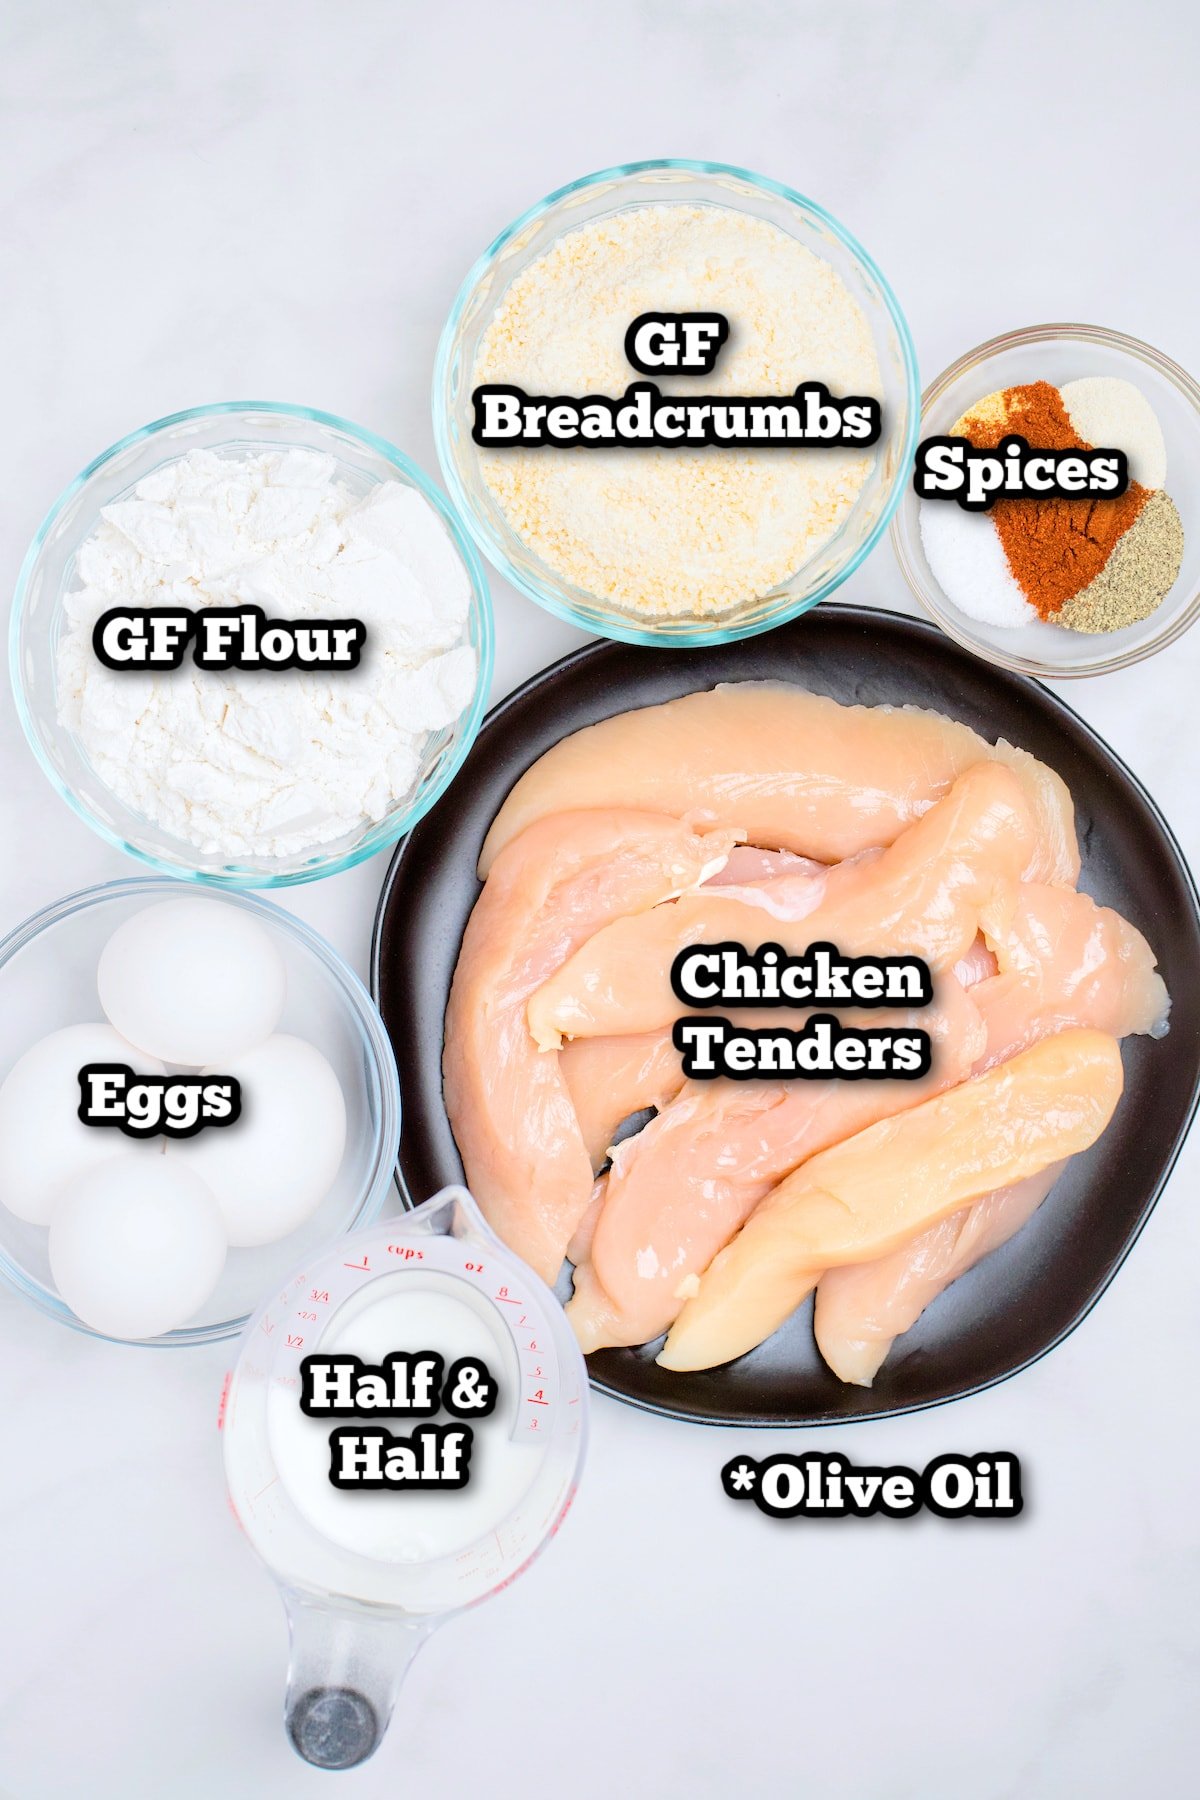
Chicken. We’re using chicken tenderloins. A chicken tenderloin is the piece that is attached to the side of the chicken breast, and is typically more tender than the breast itself. That being said, you could also cut a chicken breast into strips if that’s what you have.
Most cuts of chicken would work for this recipe, but the bigger your pieces get, the longer they will take to cook.
Gluten Free Flour. Any gluten free flour blend that you have would work for this recipe. Dredging the chicken in flour helps create the crispy brown crust that we’re looking for, and holds in the juices while cooking.
I also like to mix the spice blend with the flour, to help everything disperse more evenly.
Gluten Free Breadcrumbs. Depending on what seasoning you’re using, you could do plain or Italian seasoned breadcrumbs. If you don’t have store-bought, you can also make them in a pinch by pulsing some plain gluten free cereal in a food processor for a minute.
Eggs. Eggs are a binding agent, meaning they help hold all of the breading ingredients together.
Half and Half. Mixing the eggs with a splash of half and half helps add fat to the recipe, and gives it some flavor. You can also use regular milk or cream for this part.
Spices. You have a few options for spices, and it all depends on your own preferences. I like to make these quickly, so I’ll use kosher salt, black pepper, onion powder, garlic powder, and paprika.
If you’re looking for more ideas, try my Ranch Seasoning Mix, or Rotisserie Chicken Seasoning. You can also use taco seasoning or Italian seasoning if you have it.
Olive Oil. While you’re saving calories by baking instead of frying, you still need a small amount of oil to get the crispy coating. You want the spray kind so it’s easy to evenly coat everything.
I always have olive oil by my stove, but you can also use avocado oil, canola oil, or plain vegetable oil.
Would you like to save this recipe?
How to Make Baked Chicken Tenders
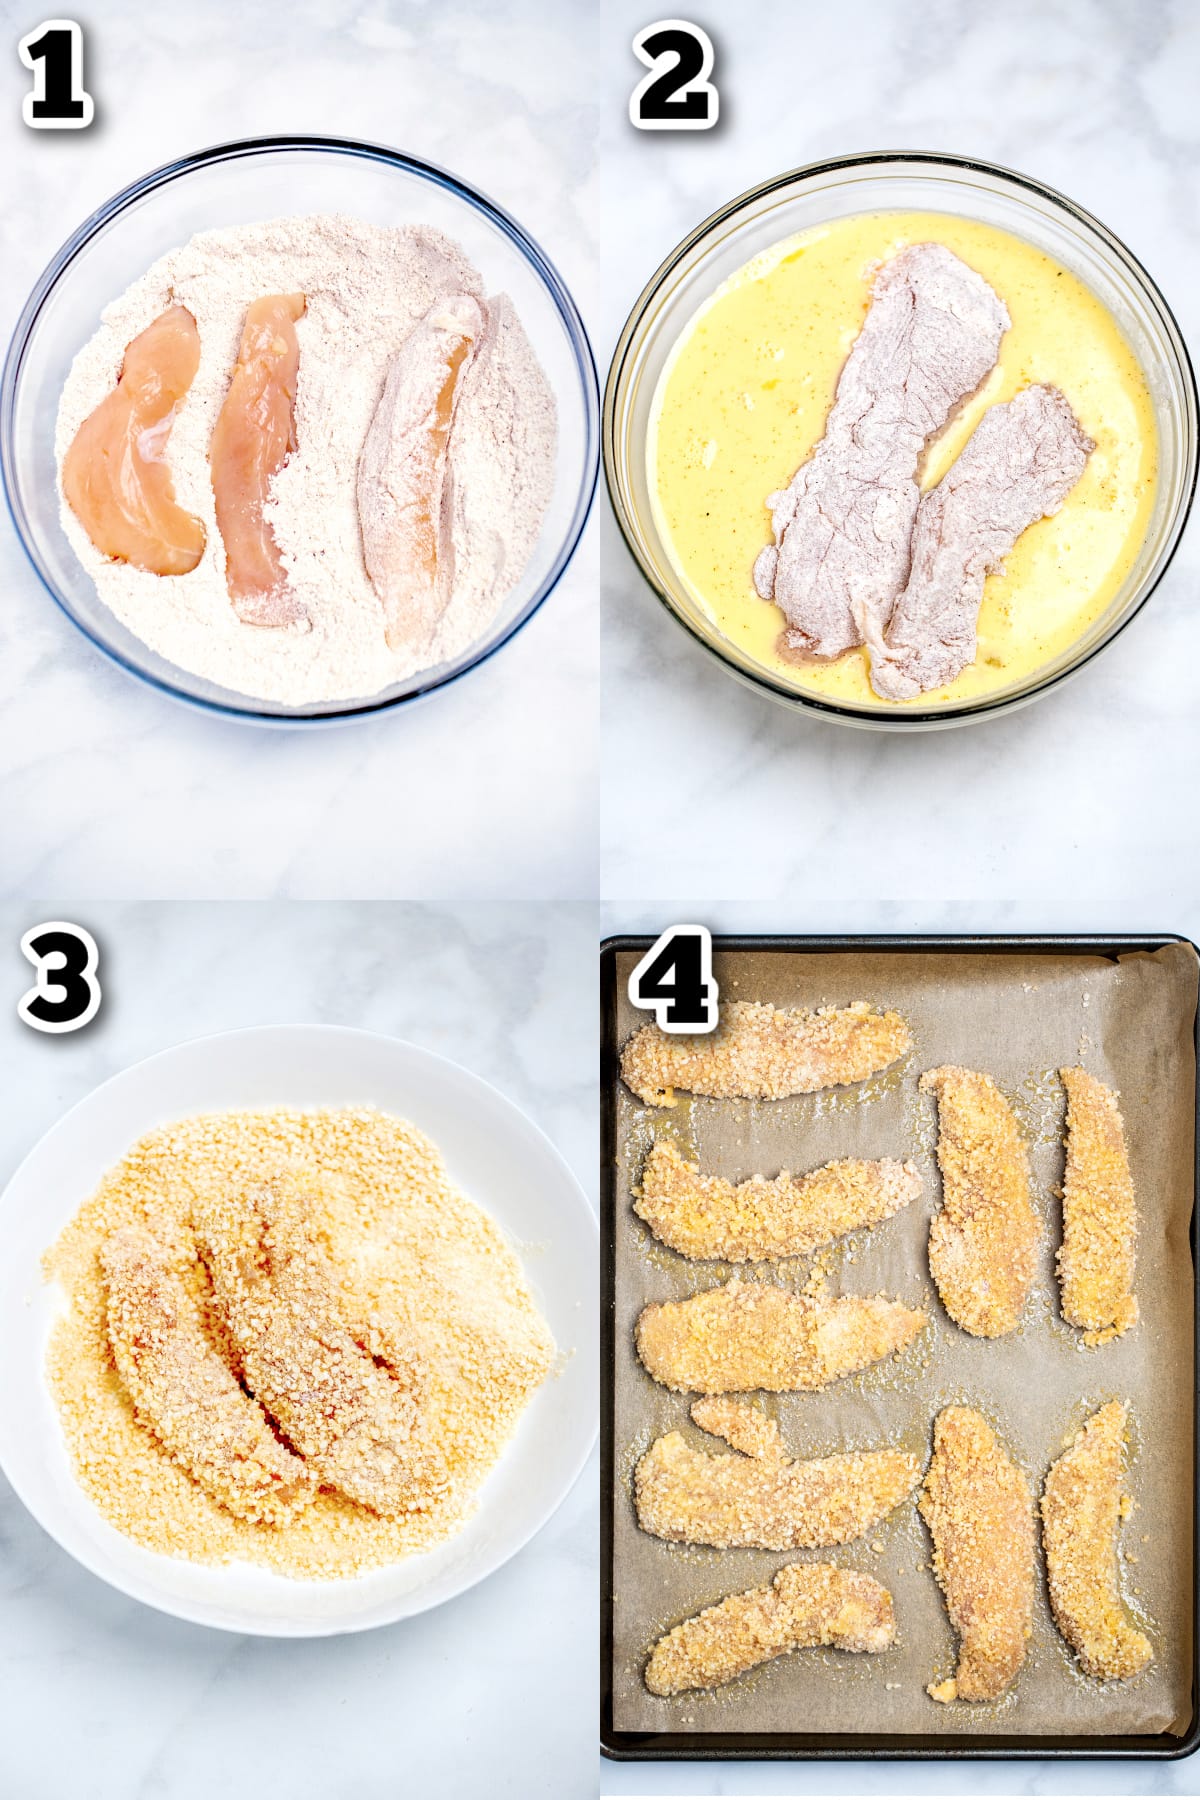
- Preheat the oven to 425°F. Line a large baking sheet with parchment paper and set aside. Set out three separate shallow bowls. In the first bowl, whisk together gluten free flour and spices. In the second bowl, whisk together the eggs and half and half. In the last bowl, add bread crumbs. Working in batches, add a piece of chicken to the first bowl and coat in the flour, gently shaking off any excess.
- Then dip the flour-covered chicken into the egg mixture, coating the piece entirely. Use a fork to lift the chicken out, allowing any excess to drip off.
- Place the chicken tender into the bread crumbs and turn to completely coat. You can gently press down with your fingers in any spots that seem too loose, and shake off any excess. Place the chicken on the prepared baking sheet in a single layer. Repeat with the rest of the chicken pieces, leaving some space between each one.
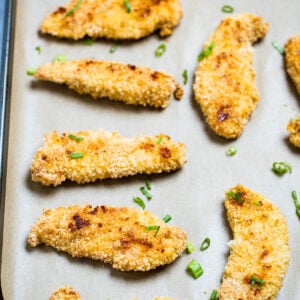
- Once all of the chicken is breaded, lightly spray each piece with olive oil, until the breadcrumbs look just wet. Flip over and spray the other side. Bake the chicken in the preheated oven for 10-12 minutes. Carefully use tongs to flip the pieces over, and cook for an additional 10-15 minutes, or until it reaches an internal temperature of 165°F and the outside looks crispy and golden brown.
Frequently Asked Questions
It is very important to give your chicken strips a light coating of oil before putting them in the oven. This “fries” the breading when it hits the heat, making it crispy and golden brown.
A quick way to get your coating crispy is to turn on the broiler and broil the chicken for 2-3 minutes. Watch it really closely, because the broiler can burn food really quickly, too.
There’s a few ways to prevent dry chicken. The first is to watch your oven temperature and cooking time. Once the chicken is done, remove it from the heat. Cooking chicken tenders past 20 minutes will usually dry the chicken out. Make sure it reaches 165°F.
Another way is to brine your chicken strips before cooking. This helps the meat to hold onto moisture, and also adds a lot of flavor. You can use water mixed with some salt and soak the chicken in the refrigerator for about 30 minutes. Another quick way to do this is to use pickle juice, which also adds a ton of flavor to gluten free chicken tenders.
More Chicken Recipes
- Crockpot BBQ Chicken Thighs
- Italian Dressing Chicken
- Marinated Chicken Drumsticks
- Instant Pot Chicken and Potatoes
Storage
- Refrigerate leftover baked chicken tenders for 3-4 days in an airtight container. Reheat in the toaster oven for a crispy coating.
- Freeze leftover baked chicken tenders in an airtight container for 2-3 months. Cook frozen tenders in the toaster oven on the baking setting at 400°F for about 15-20 minutes or until completely warmed through and crispy.
Cooking Tips
- Make these baked chicken tenders more spicy by adding red pepper flakes or additional cayenne pepper to the flour mixture, or a few dashes of hot sauce in the egg mixture.
- Try using gluten free panko breadcrumbs for an extra crispy coating on these gluten free chicken tenders.
- Add an extra teaspoon garlic powder to the seasoning mix, then top each piece of chicken with parmesan cheese when they come out of the oven for a garlic parmesan version.
- I recommend using a shallow dish because it makes it easier to fully coat the chicken pieces. If you don’t have a regular shallow dish or shallow bowl, try using a pie plate.
Tried this recipe? ⭐ Leave a review and share what worked best for you—your tips help other home cooks get the same delicious results!
Baked Chicken Tenders
Equipment
- 1 baking sheet
- 3 shallow bowls
Ingredients
- 2 pounds chicken tenderloins, boneless, skinless
- 3/4 cup gluten free all-purpose flour
- 4 large eggs
- 1/4 cup half and half
- 1 1/2 cups gluten free plain breadcrumbs
- 1 teaspoon onion powder
- 1 teaspoon garlic powder
- 1 teaspoon paprika
- 1/2 teaspoon salt, or to taste
- 1/2 teaspoon black pepper, or to taste
- extra virgin olive oil spray
Instructions
- Preheat the oven to 425°F. Line a large baking sheet with parchment paper and set aside.
- Set out three separate shallow bowls. In the first bowl, whisk together gluten free flour and spices. In the second bowl, whisk together the eggs and half and half. In the last bowl, add bread crumbs.
- Working in batches, add a piece of chicken to the first bowl and coat in the flour, gently shaking off any excess. Then dip into the egg mixture, coating the piece entirely. Use a fork to lift the chicken out, allowing any excess to drip off. Finally, dip the chicken into the bread crumbs and turn to completely coat.
- Place the chicken on the baking sheet. Repeat with the rest of the chicken pieces, leaving some space between each one. Lightly spray each piece with olive oil, until the breadcrumbs look just wet. Flip over and spray the other side.
- Bake for 10-12 minutes. Carefully use tongs to flip the pieces over, and cook for an additional 10-15 minutes, or until they reach an internal temperature of 165°F and the outside looks crispy and golden brown.
Notes
- Refrigerate leftover chicken tenders for 3-4 days in an airtight container. Reheat in the toaster oven for a crispy coating.
- Freeze leftover chicken tenders in an airtight container for 2-3 months.
- Don’t forget the olive oil, or they won’t be crispy!
- Make these more spicy by adding red pepper flakes or additional cayenne pepper to the flour mixture, or a few dashes of hot sauce in the egg mixture.
- If you don’t have a regular shallow dish or shallow bowl, try using a pie plate.
Nutrition
Would you like to save this recipe?
We are a participant in both the RewardStyle and Amazon Services LLC Associates Program, which are affiliate advertising programs designed to provide a means for sites to earn advertising fees by advertising and linking to amazon.com and through RewardStyle.